For those not familiar with this topic, it relates to a recent presentation I made at a VMware User Group virtual meeting around managing vSphere and some best practices. This also is applicable to a recent home-lab upgrade and wanted to provide a current method for configuring this setup and the lack of official support documentation around the configuration of this service.
When I used to be a VMware customers, I always wanted to ensure I had a good handle on driving root cause on any issues experienced in our VMware environment. Purple Screen of Death issues on vSphere hosts was always a challenge due to the issues around the knee jerk reaction to reboot a host when a PSOD event occurred just to get things operating normally as fast as possible.
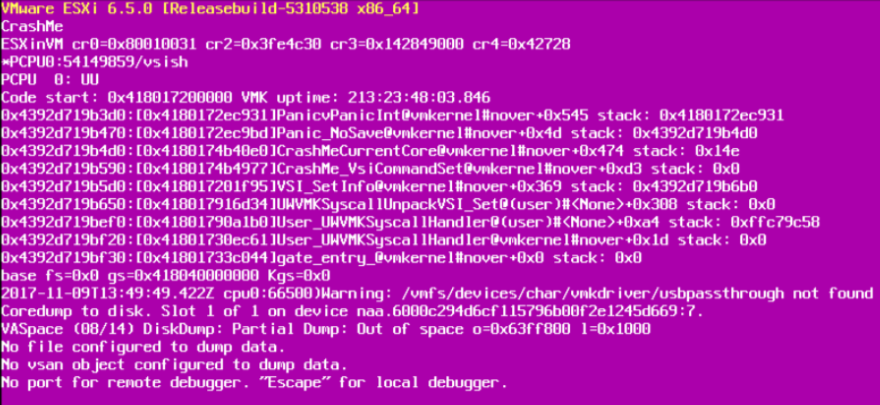
When a vSphere host has a PSOD event, there’s a core dump file of the memory contents that is created in the scratch location of a host. That file, if not stored on persistent storage (think of booting ESXi with Autodeploy or running ESXi headless) gets removed upon reboot. A way to capture the dump file is to use the network dump service allowing the ESX host to send the core dump file over the network to a file storage location.
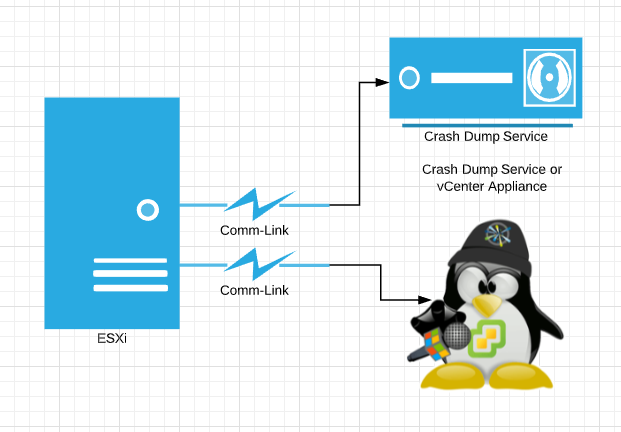
There’s two parts to allow this process to work.
- configure a crash dump server either on a file server or leverage the embedded service in the vCenter Server appliance itself.
- configure ESXi hosts with a network core dump location
I chose option 2 for my home lab setup although based on the size of your environment, you may choose to go with option 1 and ensure you have adequate storage available to store the size of the dump files and keep your vCenter appliance directory cleaner. Option 2 was a bit of a challenge, as the service option for the vCenter Server appliance does not provide a way to configure the startup service and the default setting is set to manual startup mode. If you have to restart your vCenter, by default, you have to log into the VAMI (VMware Appliance Management Interface) https://myvcenter:5480 and start the service.
After doing some digging, and thinking back to my cli days, I wanted to look at the existing services running on my vCenter appliance to see what configuration options were available. Here’s how I looked at this a little deeper.
- Turn on SSH access on my vCenter Appliance (VAMI config)

2. SSH to my vCenter appliance and launch the command line shell
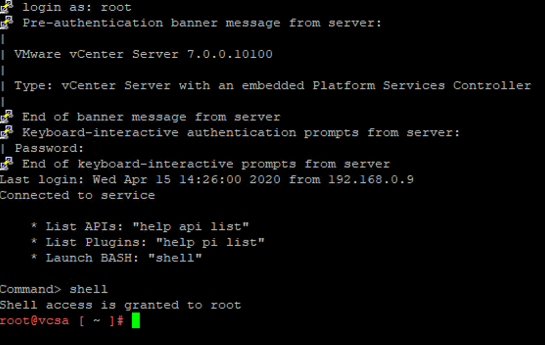
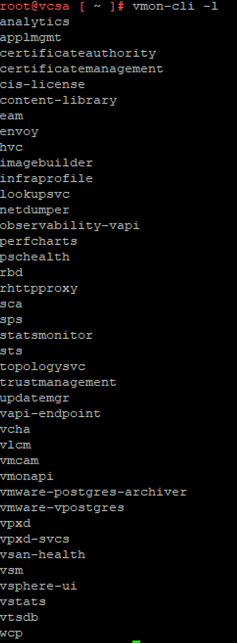
3. use the vmon-cli tool to list features available
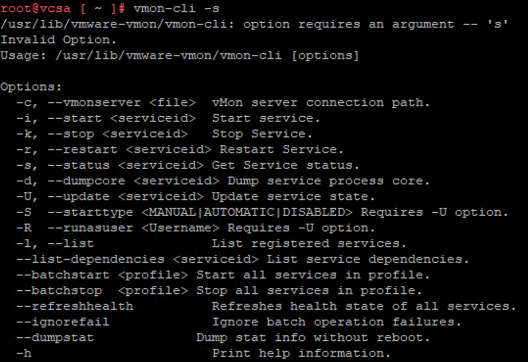
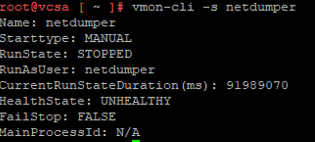
4. Find the coredump service (netdump) and check it’s status
5. Change the status and start the service
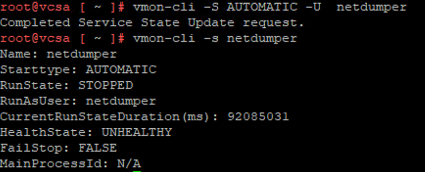


Keep in mind that I used the VAMI to start the service but I could have run the command to start the service, or just restarted my vCenter appliance.
Now that the vCenter is configured, I needed to configure my ESXi hosts to enable the network dump location and start the service on all my lab hosts. You can use a powerCli script or use the CLI option I used below by enabling SSH on your ESXi hosts and running the following commands (I used my service console vmkernel port to bind the settings to my vCenter appliance IP address)
1. esxcli system coredump network set –interface-name vmk0 –server-ipv4 myvcenteripaddress –server-port 6500
2. esxcli system coredump network set –enable true
That’s it. Now my ESX hosts can send the memory core dump file to my vCenter appliance located in the /storage/netdump directory.
Why is this useful? When you call VMware Support for help and ask how did my host PSOD? They may ask for the memory dump file and without persistent storage available to maintain this file after a reboot, you may be out of luck. VMware Support will use that file for analysis to determine if there was anything running in active memory that could have attributed to the PSOD and hopefully provide root cause, but more importantly, a remediation plan to prevent this from happening again.


Recent Comments