I decided to write up some lessons learned when deploying the latest NSX-T instance in my home lab. I’m using NSX-T 3.1 and trying out the options to use the Global Manager option for deployment. Here’s a summary of what I worked on:
- NSX-T Global Deployment to include 2 Global NSX Managers clustered with a VIP including a Standby NSX Global Manager. Current NSX-T Federation supported features can be found here.
- Attach Compute Managers to Global and NSX Manager appliances.
- NSX Manager Deployment to include 2 NSX Managers clustered to manage my physical lab vSphere cluster and an additional 2 NSX Managers clustered to manage my nested vSphere cluster.
- Test cluster failover from node to node.
- All NSX Global and NSX Manager appliances configured to use Workspace One Identity for individual appliance authentication as well as the VIP used for each cluster.
- Configure all NSX Global and Manager appliances for backup.
Deploying NSX-T Global Managers
This process was fairly simple, downloading the NSX-T 3.1 unified appliance, adding the unified appliance to my vSphere content library, and walking through the NSX-T Unified OVF deployment to get the first NSX-T Global Manager appliance up and running.


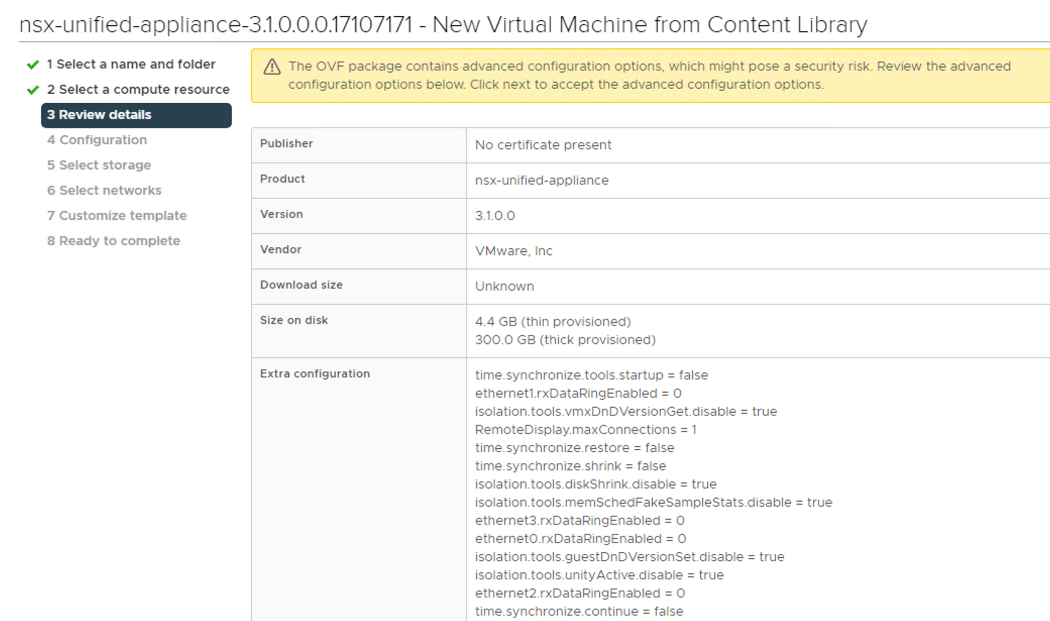
For my home lab use I picked the Small size (4 vCPU x 16GB RAM x 300GB sttorage) for everything and upon completing the deployment only because I didn’t want to consume too many resources for lab testing. If this was a production deployment of any size and scale, I would choose the Large option (12 vCPU x 48GB RAM x 300GB Storage) to ensure I had enough resources available for production usage.

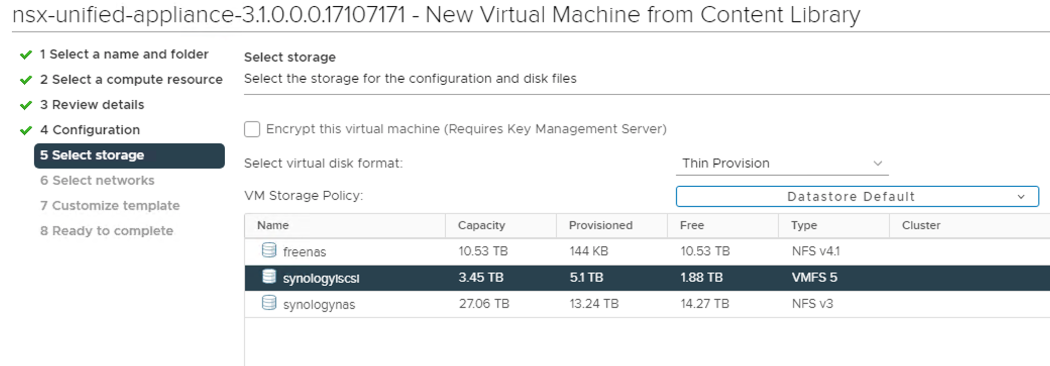
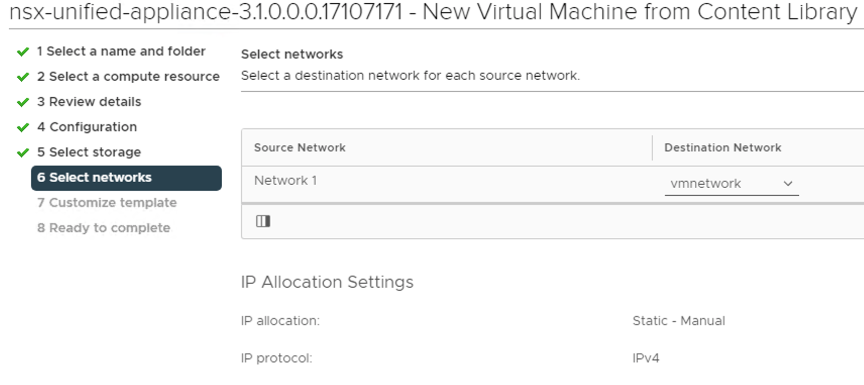
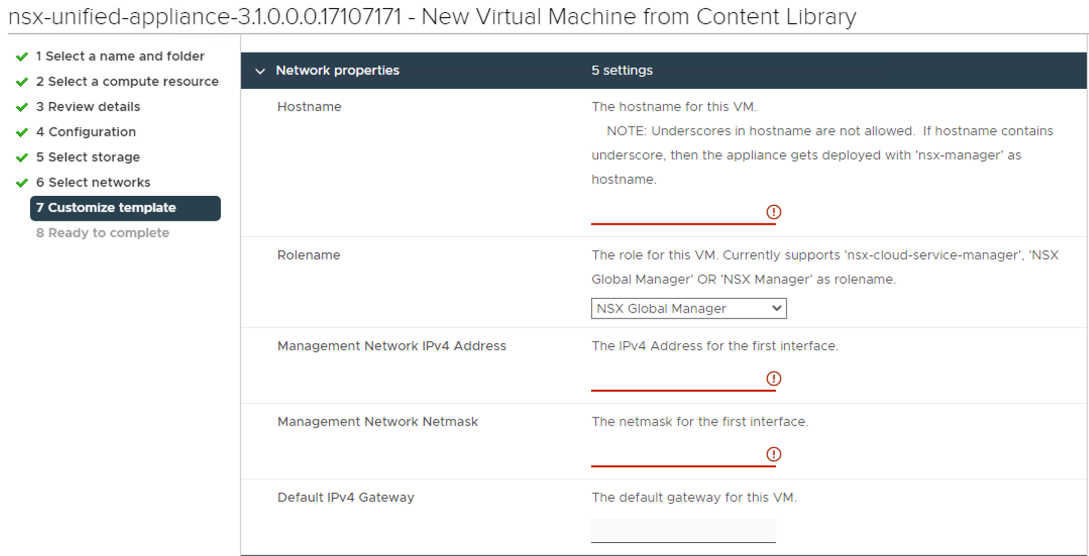
On the customize template section, I chose to use the same password for the root, admin, and audit accounts, set my hostname, IP, Mask, Gateway DNS, Domain Search List, NTP Server settings, but important to choose the proper role using the drop down box option for NSX Global Manager, and I also enabled SSH and Root Login options for lab purposes but I would probably not enable that option in production.

**Lab Note – before powering on the NSX Global appliance, I reconfigured the virtual machine to not reserve the CPU and RAM. I’m running a lab and need the resources, but note for production deployments, the virtual appliance does reserve the amount of vCPUs in MHz and RAM depending on the size of the Virtual Appliance picked during the deployment process.
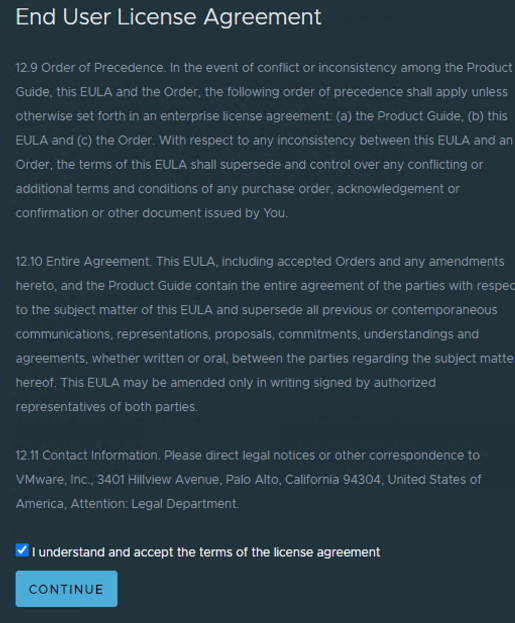
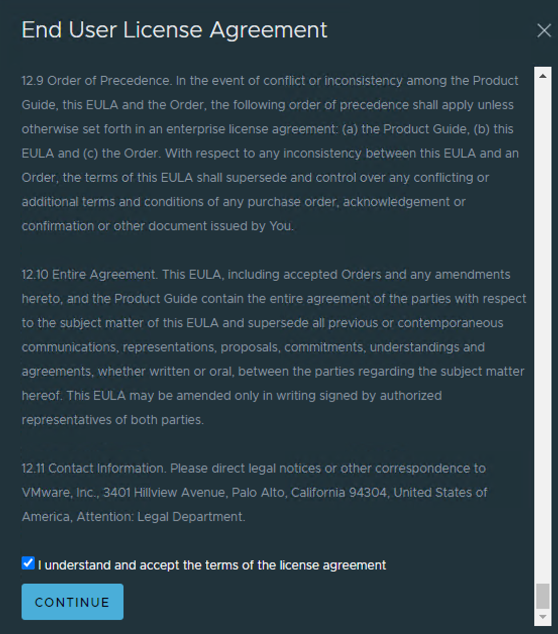
Once the NSX Global Manager Appliance completed the OVF deployment, I powered on the virtual machine and once services were up and running, connected to the IP address of the appliance using the https://x.x.x.x address I configured during the wizard, accepted the EULA.
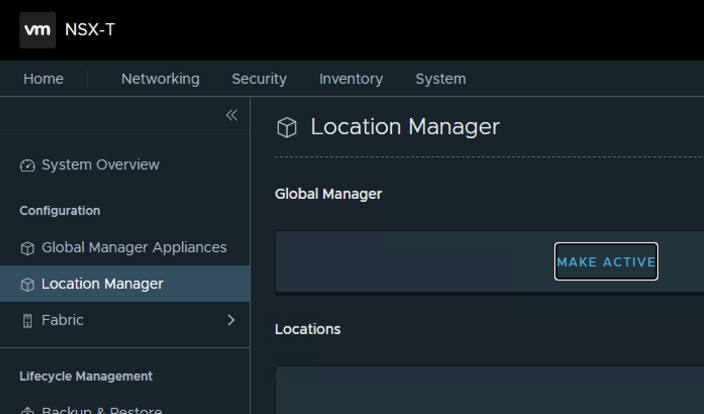
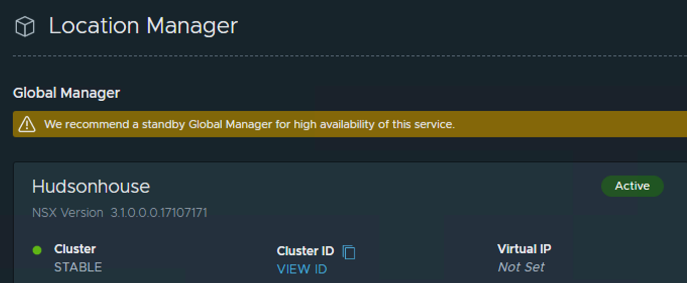
With a working NSX Manager Global appliance I went under the System Tab and gave it a Global Manager Name by selecting the Location Manager menu item on the left and activating the cluster. It’s important to note the Global Manager name used (in my case Hudsonhouse) to use this for later when adding a standby node.


** A little tip for lab environments, if you don’t want your appliance passwords to expire, you can SSH into your NSX appliances and run the following commands to prevent passwords for the root, admin and audit accounts from expiring. Do this for every NSX appliance you don’t want to have the passwords expire on. In production deployments, I would recommend changing the password using the same password rotation policy you use on other infrastructure services.

Next up, add a compute manager, by going to the Fabric Menu on the left and selecting Compute Managers and clicking the + ADD COMPUTE MANAGER option to enter my vCenter information.
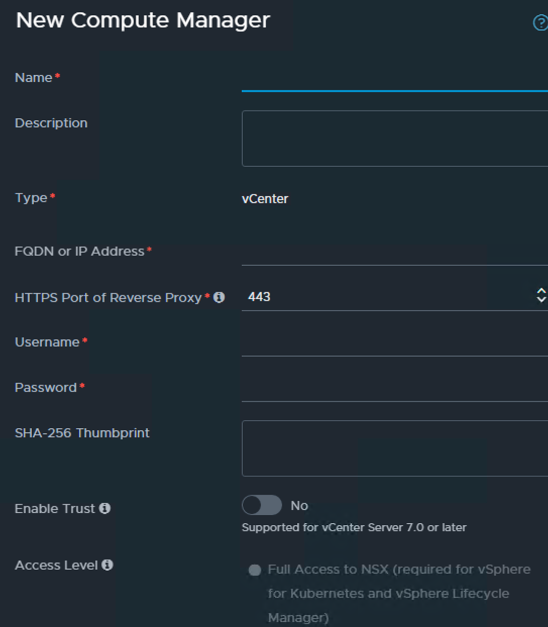
When complete, I ended up with 2 vCenter servers for each environment that I planned to use NSX-T in a federated model.

With compute managers in place, the process of adding nodes to the existing Global Manager cluster is simple and now streamlined. Going back to the Global Manager Appliances menu on the left, there’s an option to add an NSX Appliance. In the screenshot below, I’ve already added my second appliance using the Add NSX Appliance wizard. This is much easier than deploying from template and based on the cluster type, automatically deploys a similar node into the cluster.
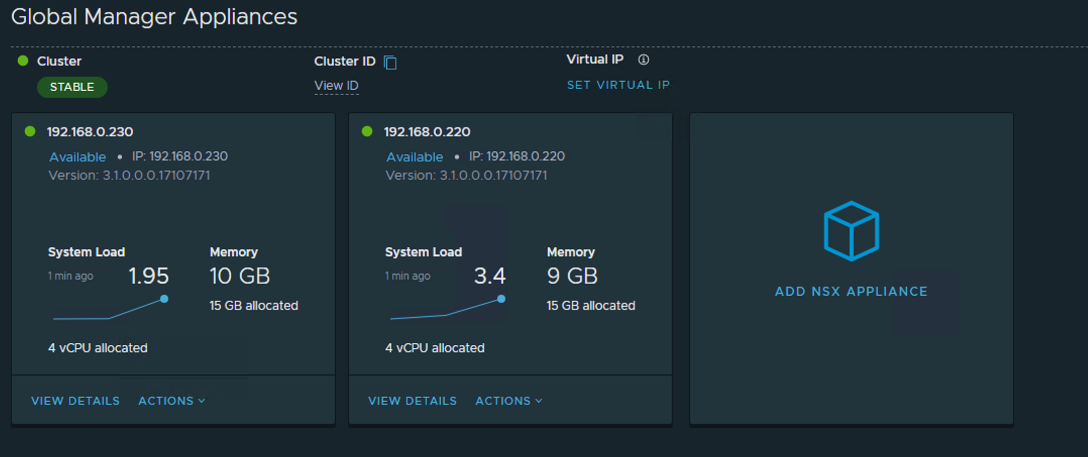
Next step is to add a virtual IP as shown in the screenshot above is quite simple and is added to the primary 1st node deployed in the cluster. Don’t fret as the VIP is added, your connection to NSX Manager will drop as both nodes are reconfigured with the VIP address as part of the clustering services and will come back with an IP address assigned to the cluster and directly to one of the nodes.

At this point, you can rinse and repeat depending on how many active nodes are needed in the cluster using the size and scaling recommendations.
Next up, deploying a standby node for the cluster.
**I wish the Add NSX Appliance wizard worked for the standby node, but unfortunately, in my testing, did not work and you are required to deploy from OVF again in order to stand up a unique instance that you’ll link to the cluster later.
For now, follow the same steps (recommended to deploy a standby node in a different location and add to the cluster) to deploy another appliance from OVF template using the same process above.
Once completed, we’ll add the standby Global Manager appliance using the Location Manager option. Go to the System Tab on top and then go to the Location Manager option on the left side of the Global Manager UI.

You’ll notice that there’s a Caution message at the top of the screen recommending to add a standby Global Manager for high availability. My active cluster is shown with both nodes and the corresponding VIP along with an option to Add Standby.
We’ll get that information later from the new Global Manager standby appliance we deployed from OVF previously. Log into the standby Global Manager appliance now that it’s deployed successfully, powered on and responding, accept the EULA. Go to the System tab -> Global manager Appliances menu on the left -> click on the “View Details” option for the appliance.
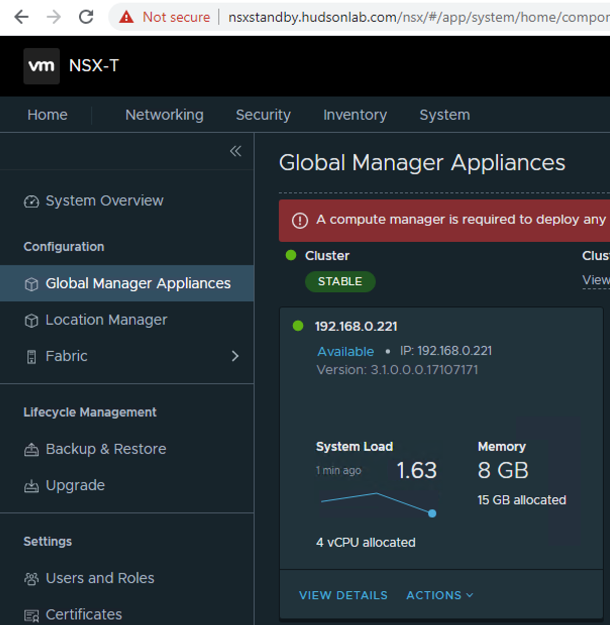
Viewing the details allows us to get the Cert Thumbprint needed to add as a standby appliance in the main Global Manager cluster.
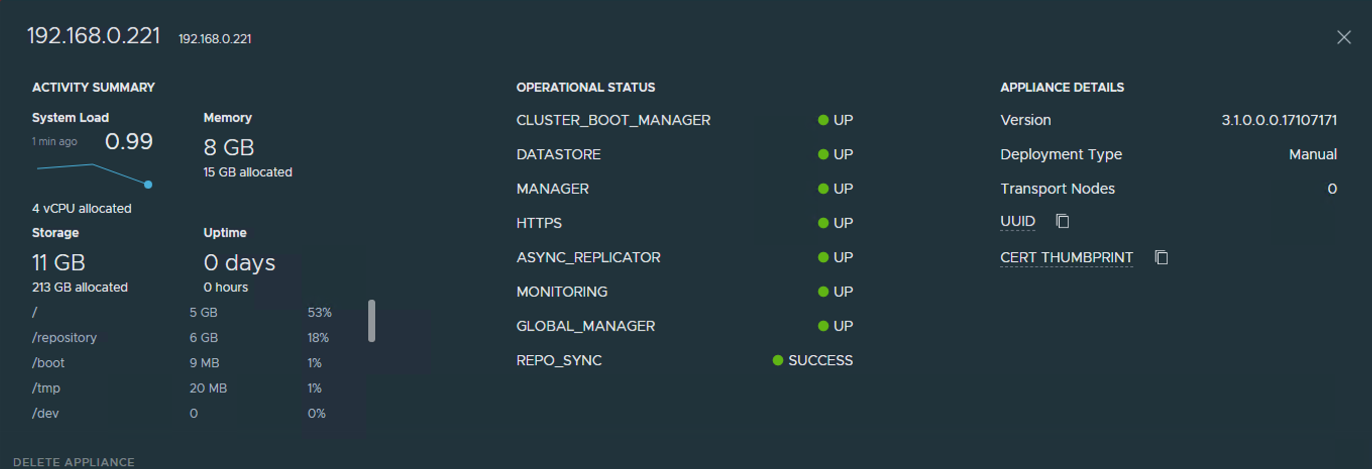
Click on the copy icon next to the Cert Thumbprint that we’ll use to add to the Global Manager cluster as a standby.
Add compute managers just like in the main cluster configuration so the standby appliance has access to the same compute manager resources. Once you have this complete, we’ll go back to the main standby Global Manager appliance and get the details needed to add to the main cluster as a standby node.
If logged out log back into the active NSX Manager Cluster Global appliance, go to the System Tab -> Location Manager left menu and Click on the “Add Standby” option. Here’s where you’ll populate the details from the standby node including the name, FQDN/IP address, admin username and password, and then paste the cert thumbprint in the box copied from the standby node.
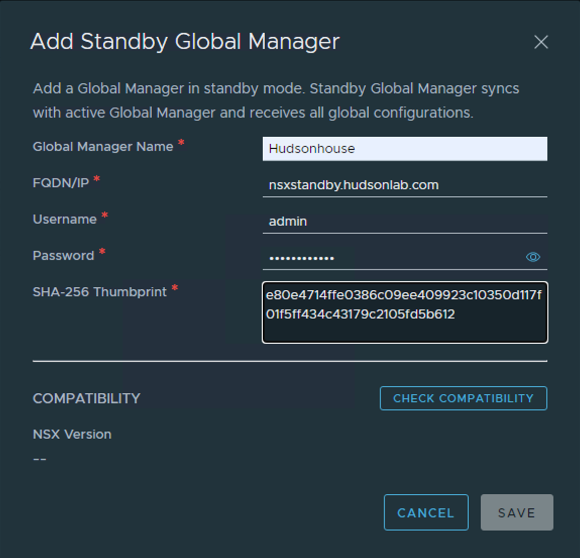
Click on the Check Compatibility option to verify connectivity and then click save. Once completed, you’ll have an NSX Global Manager Cluster with a Standby Node available.

Deploy On-Prem NSX Managers
***Note – no licenses needed to install at this point as the Global managers do not require any licensing, but at this point we’ll need to determine the version of NSX Manager we want to use and gather licenses required to make them work.
Back to my content library to deploy another NSX OVF file, with the exception being now that the role for the appliance I’ll be using with be the NSX Manager role instead of the global manager role.
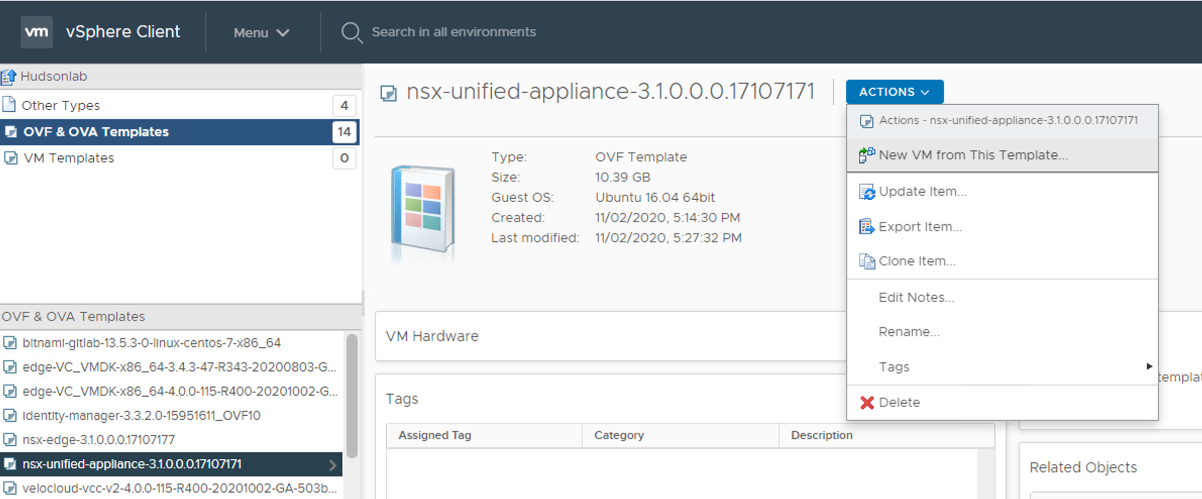
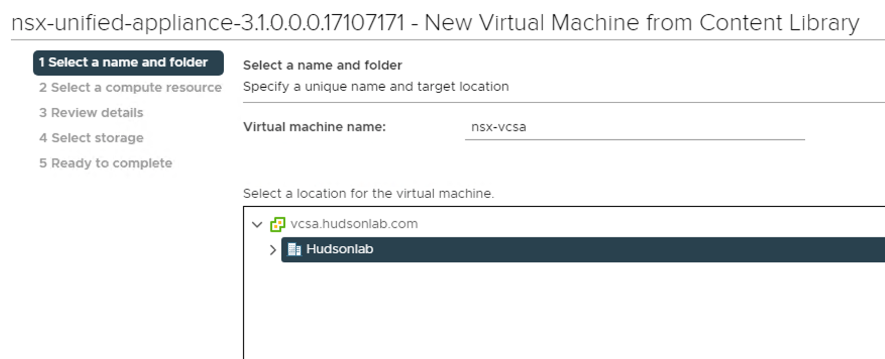

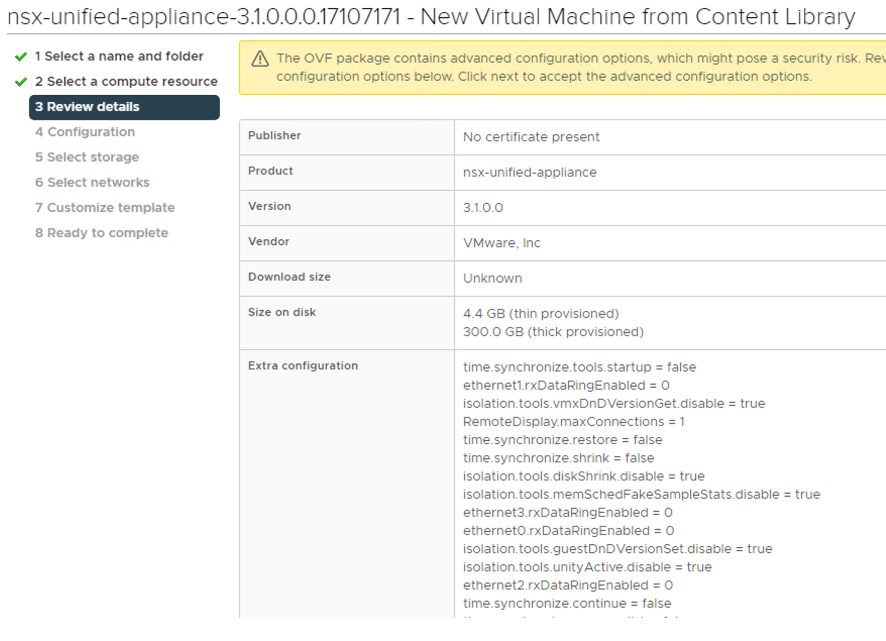

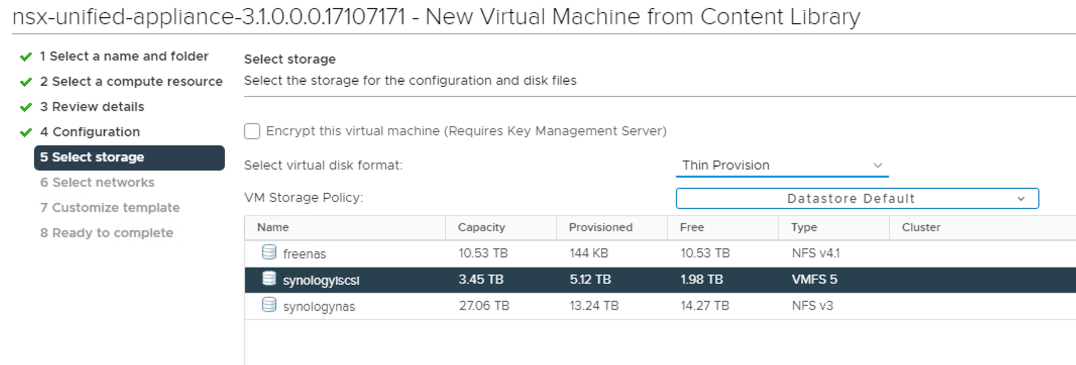
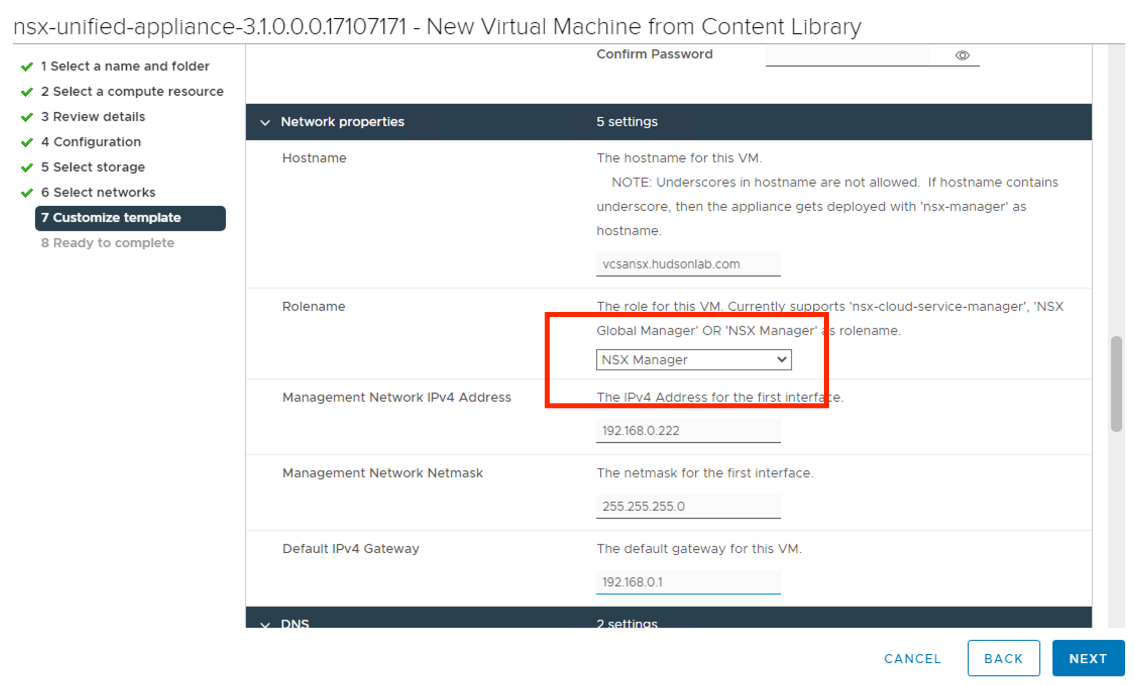
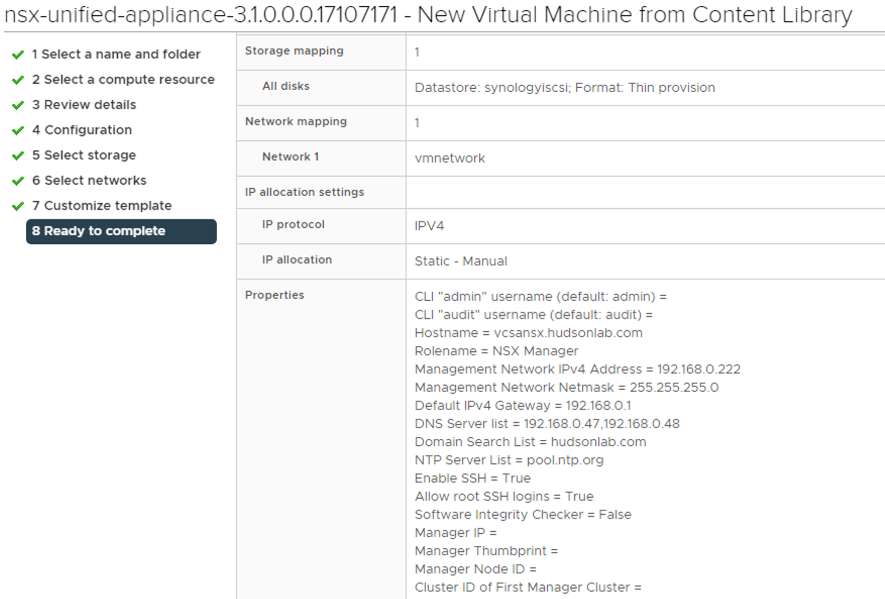
Same process as before for my homelab, choosing the Small option, ensuring the NSX Manager role was selected, and before powering on, reconfiguring the VM to not reserve CPU or RAM.
Once powered on and services are responding, I log into the appliance using the https://x.x.x.x address using the admin username and password created during the OVF deployment and accept the EULA.
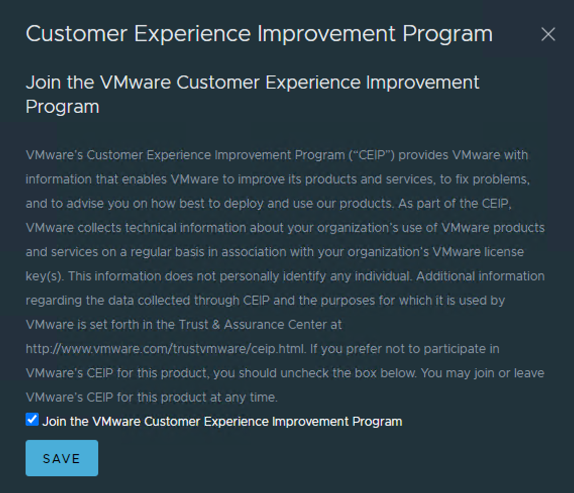
Also, using now the NSX Manager, you’ll also be prompted to join the CEIP. If you are using VMware Skyline, then I would recommend joining.
You’ll also be prompted at first login to choose the interface type you want to use, either Policy or Manager interface. See the differences between the two interfaces here in order to adjust based on your situation.
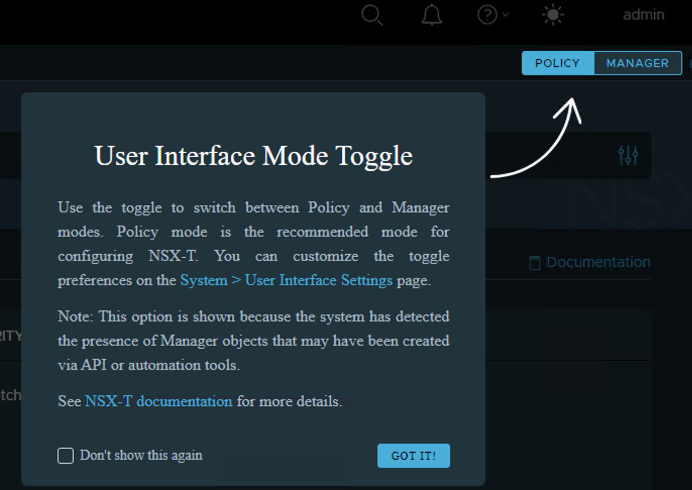
I’m setting everything up under a federated deployment so I’m using the Policy mode option.
I want to add a second NSX manager for my setup to cluster the services together, so I first need to add a compute manager in order to take advantage of the nifty deployment wizard to add another NSX Manager appliance to the cluster. I’ve explained this previously, but a quick reminder to go to the System tab -> Fabric menu on the left and expand to view the Compute Managers option -> and then +Add Compute Manager. One new option is now available to choose to Create Service Account on the vCenter compute manager which I’m selecting.
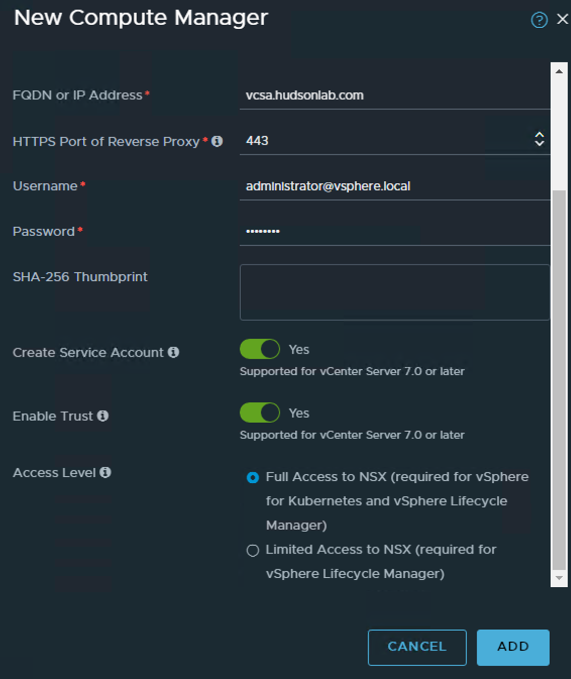
Add appropriate vcenter appliances as compute managers where you plan to deploy additional NSX Manager appliances. (**Note – you typically want one Computer Manager vCenter tied to 1 NSX Manager cluster, by trying to add a secondary, and in my case second vCenter to the first cluster, I am not able to add those same compute managers to my second NSX Manager cluster as they’ll show in use by another NSX Manager cluster).
Now back to the System Tab -> Appliances left menu option to add an additional NSX Manager appliance to the cluster.
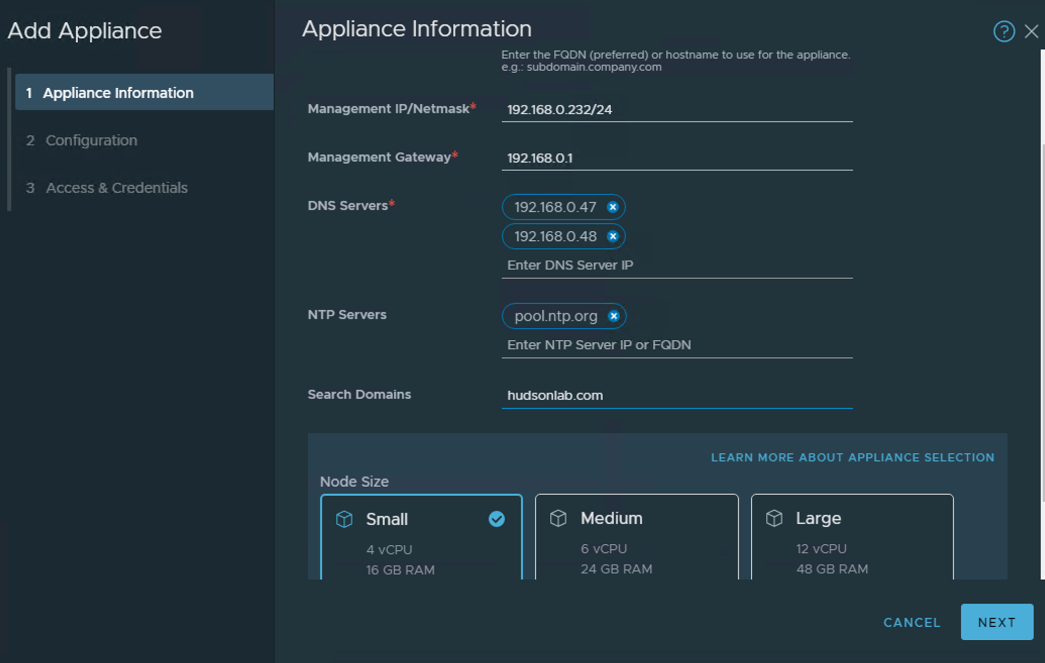
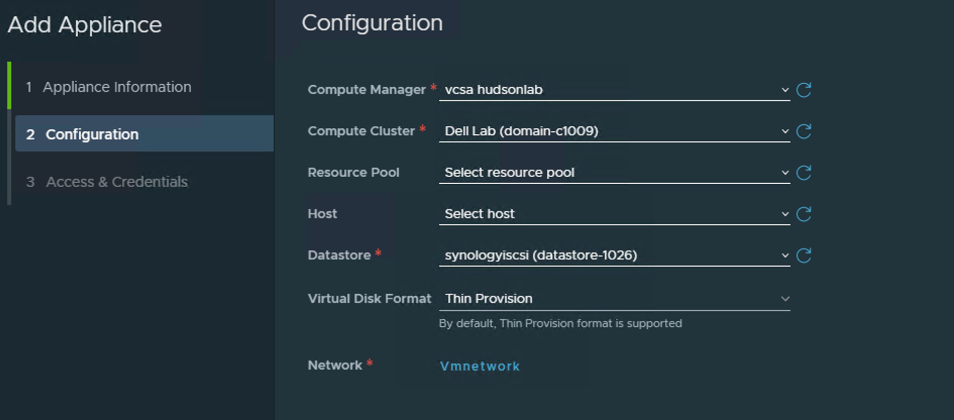
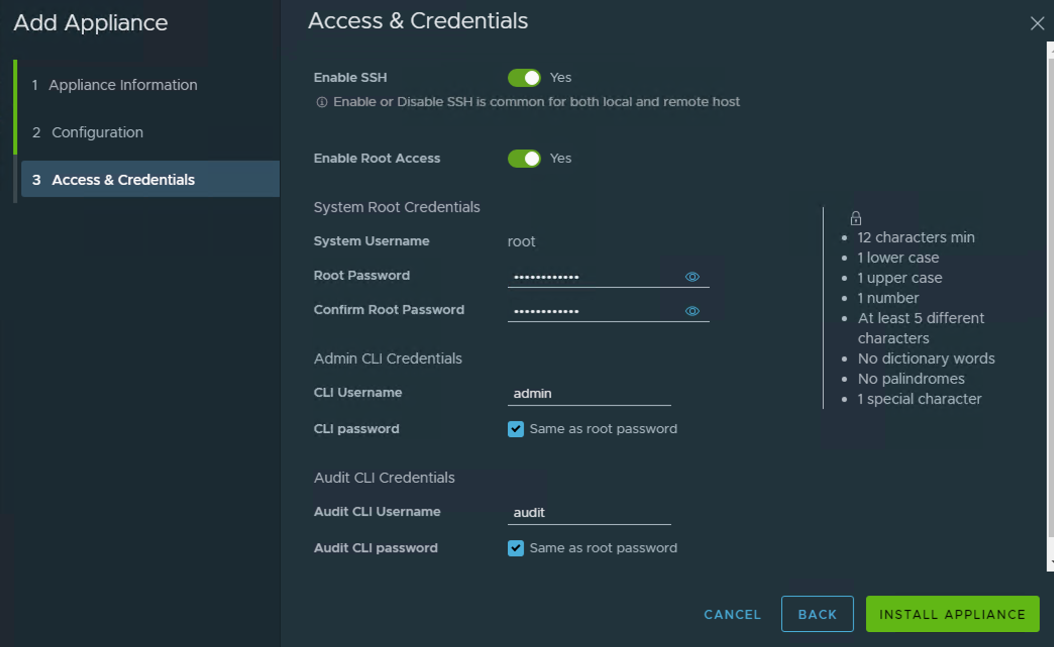
Once the second NSX Manager appliance has been deployed from the wizard, I like to keep my VM names the same (**note – the add nsx manager wizard doesn’t allow customizing the appliance VM name and will use the host name to name the VM) and also reconfigure the virtual appliance again to not reserve CPU and RAM and setup a VIP for the cluster. You’ll notice now that once the cluster has been successfully deployed, there is now a prompt to install a license key.
**Note – Production Deployments of NSX Manager are recommended to have 3 nodes.
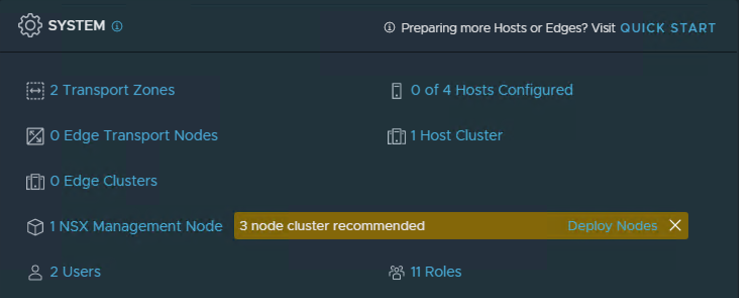
Once completed, you should have two nodes minimum in the NSX Manager cluster.
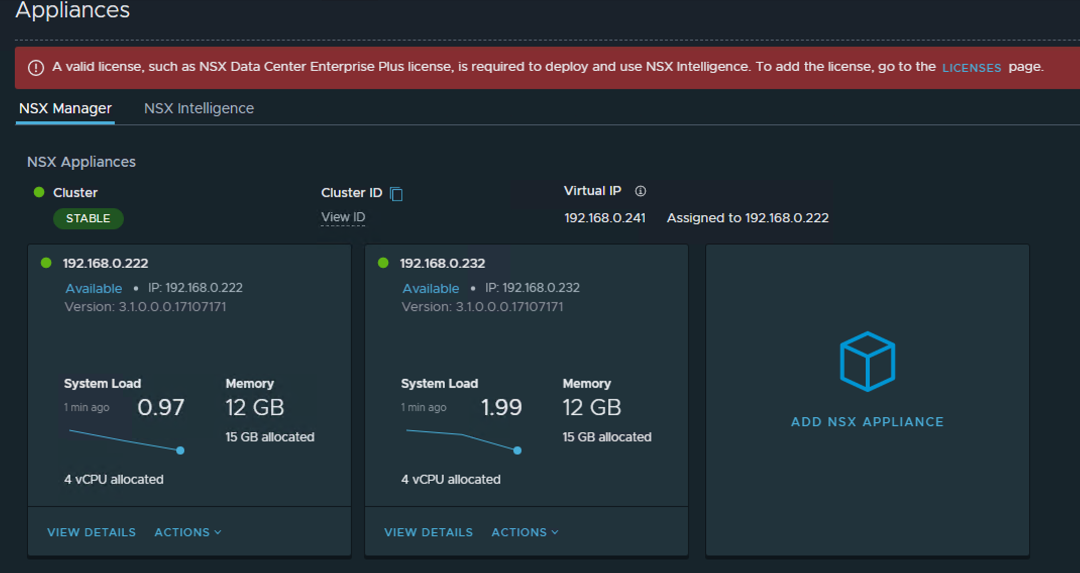
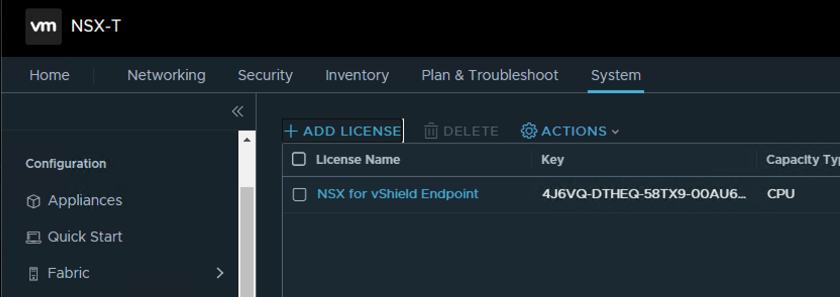
Time to license the cluster either by clicking on the hyperlink to the licenses page in the informational banner above or by going to the System Tab -> Settings left menu -> Licenses section. Deploy the license you plan to use for NSX, in my case I’m using NSX Enterprise Plus licensing. By default you’ll have the NSX for vShield Endpoint already installed in case you plan on use a hypervisor based antivirus solution. Click on the +ADD LICENSE option and add your appropriate license key.


At this point, I’m going to rinse and repeat for a second NSX Manager cluster to run my nested vCenter lab environment. I’ll be doing this a little different using the NSX CLI as I don’t have enough resources on my nested vSphere cluster to run both NSX Manager Servers. I used the CLI instructions found here to setup both nodes, license the cluster, add a Compute Manager, as well as assign a VIP to the new cluster. (Fast Forward)
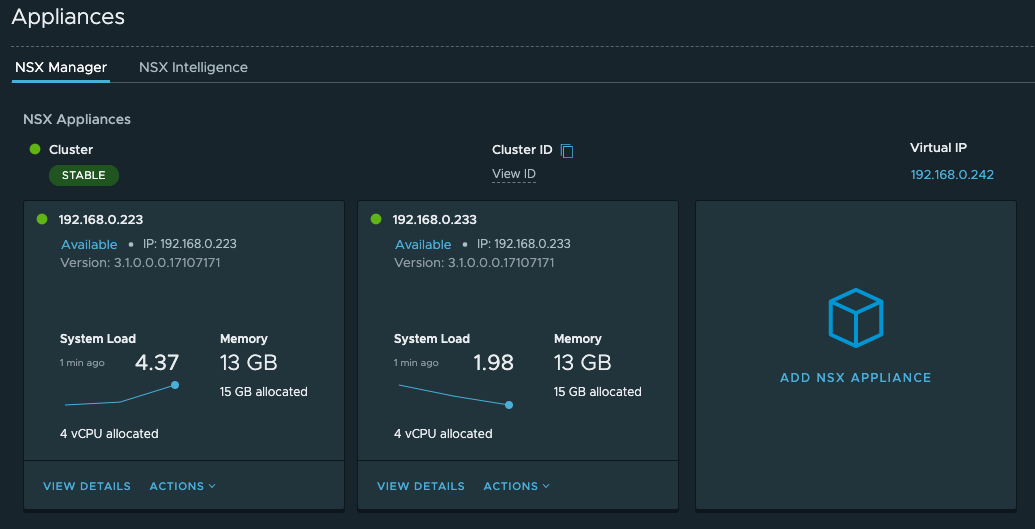
So let’s pause for a second and review what’s been completed thus far.
- Setup an NSX Global Manager 2-node cluster with a VIP and Standby node. (No Licenses Required)
- Setup an NSX Manager 2-node cluster (3 recommended for production) with a VIP, licensed using NSX Enterprise Plus key and connected my home lab physical vSphere Hosts and vCenter as a Compute Manager.
- Setup an NSX Manager 2-node cluster (3 recommended for production) with a VIP, licensed using NSX Enterprise Plus key and connected my home lab nested vSphere Hosts and vCenter as a Compute Manager.
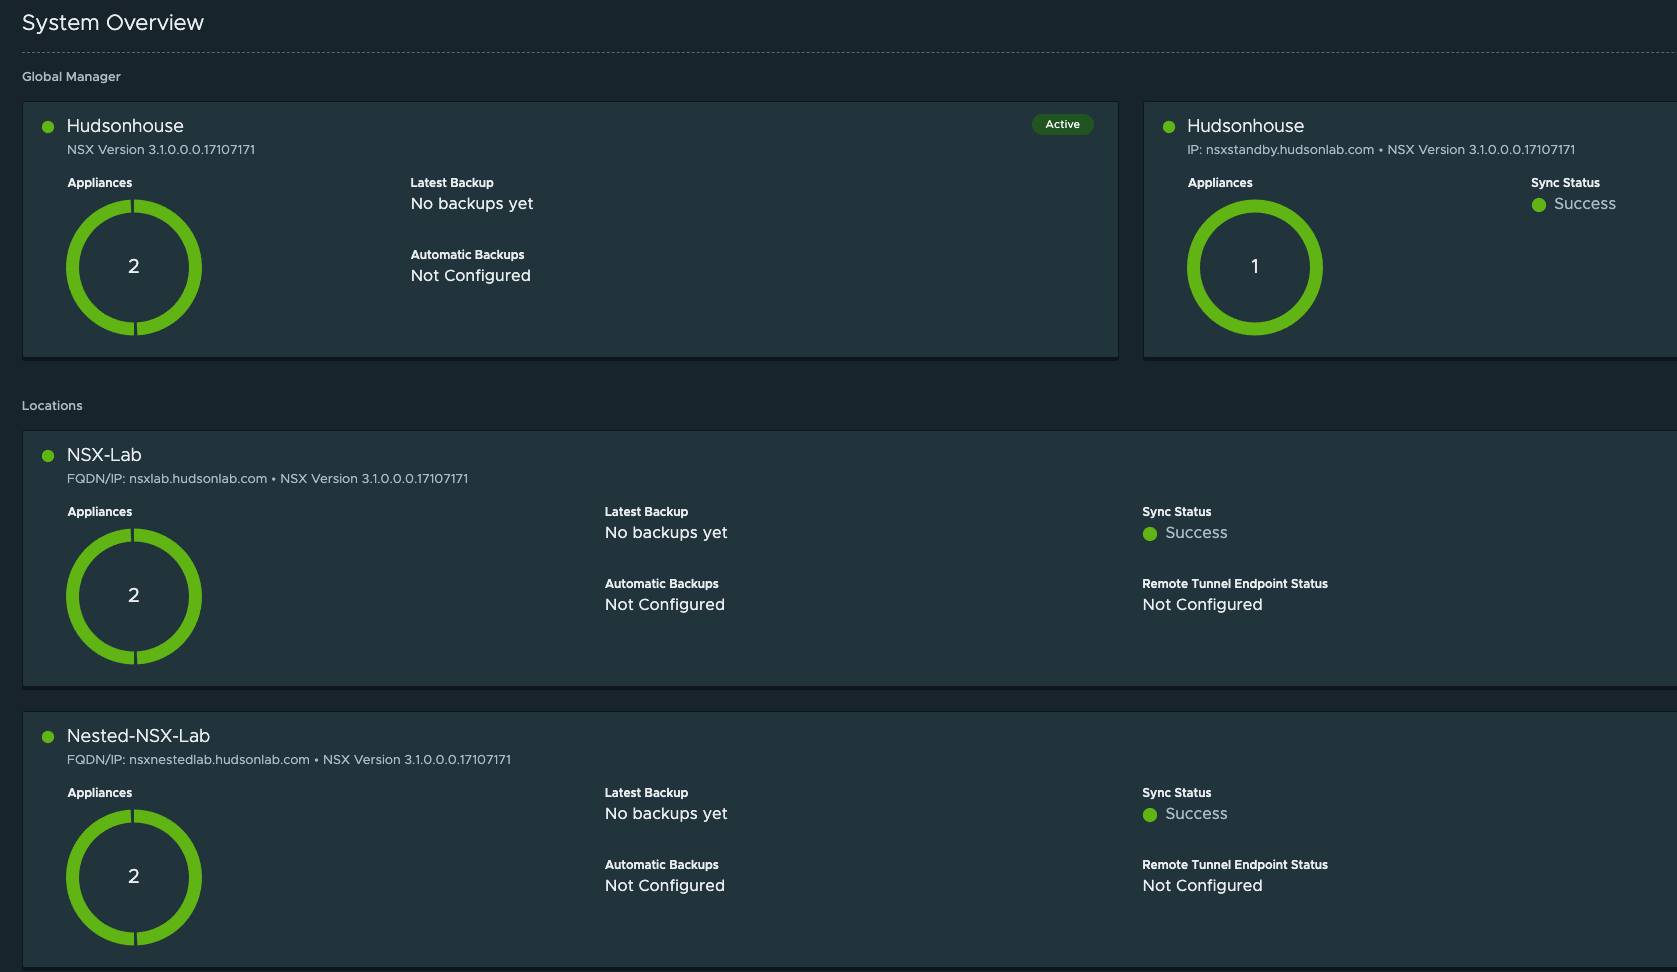
Next Step is to add both NSX Manager Clusters to my Global Manager Cluster using the Location Manager.

Logging into my NSX Global Manager VIP address, selecting the System Tab at the top and then using the Location Manager on the left Configuration menu, I’m adding both NSX Manager Clusters by using the Add New Location option. First we’ll need the NSX Manager Certificate Thumbprint from each NSX Manager Cluster which can be accomplished via CLI. CLI Options: SSH into the NSX Manager Server and run the following command ‘get certificate cluster thumbprint’. Copy and save to use in Location Manager to past into the field needed to verify connectivity. Now in Location Manager on the Global Manager click on the Add New Location option. I’ll do this for each of my NSX Manager Clusters.
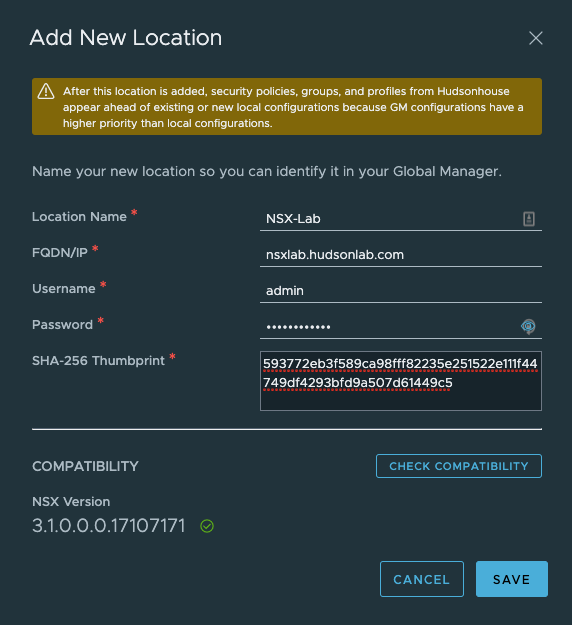
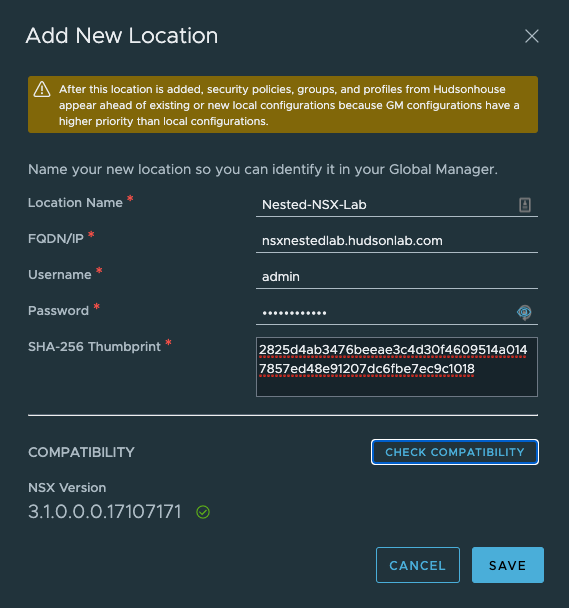
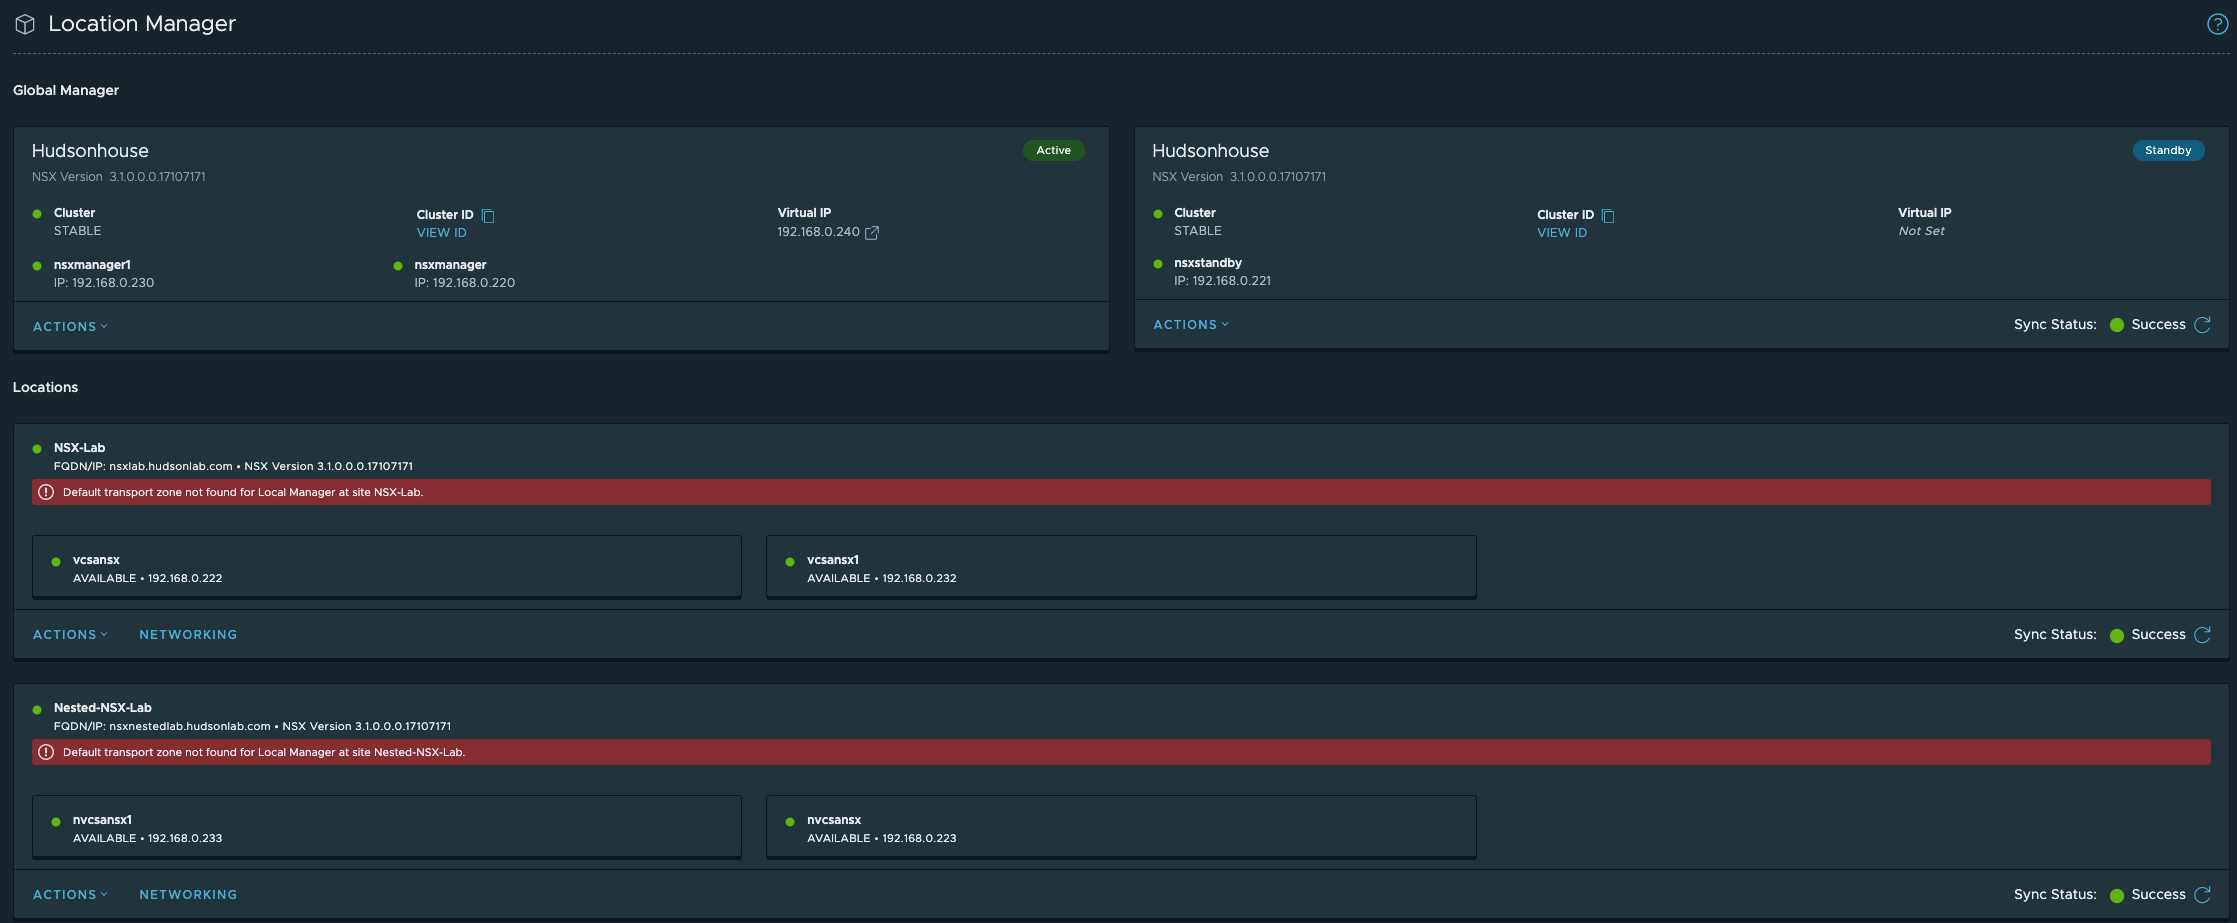
Once completed, I now have two NSX Manager Clusters connected to the Global Manager Cluster and I can now start working on prepping hosts at both locations, setting up transport zones and also play around with NSX Intelligence (possible blog forthcoming).
Testing Cluster Failover Capabilities
At this point I wanted to test cluster failover for the Global Manager and both NSX Manager clusters. The method I’m using involves a scenario where I need to patch or upgrade in which case a node would be in a state of maintenance and cluster services including the VIP would fail over to the second node in the cluster. Since this is a fairly new install, I don’t have any upgrade packages available yet (upgrade details provided later once available) however, it’s important to mention how the upgrade process works. You’ll start with each local NSX Manager and then upgrade each Global Manager. The upgrade works by using the ‘orchestration node’ which is the node not directly assigned the Cluster VIP or can be found by running this command on any of the nodes via CLI ‘get service install-upgrade’. This will tell you which node will orchestrate the upgrade process on the ESXi hosts, Edge Cluster(s), Controller Cluster and management plane.
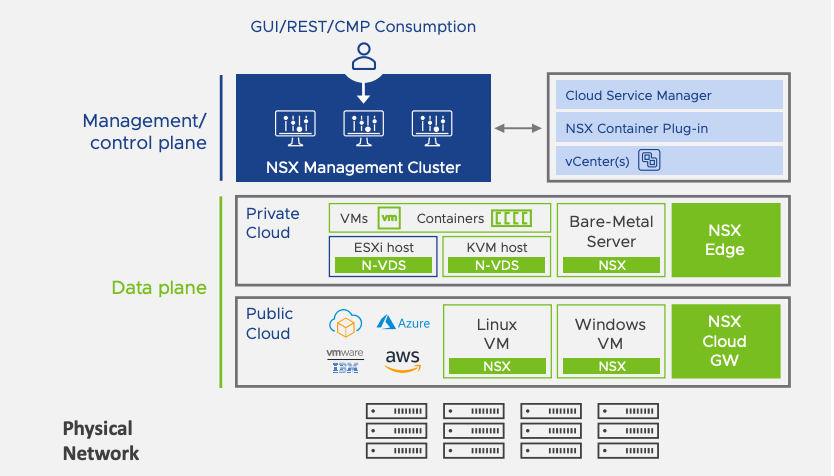
For immediate testing purposes I decided to validate this from an availability standpoint and just restarted nodes in each cluster, observed the VIP being reassigned to the second active node and back again upon restarting each node by node. The tested was designed to demonstrate the separation between the management/control plane and the data plane. Keep in mind that the data plane is not affected when the control plane is upgraded or has a loss in connectivity due to a Cluster node rebooting. This is similar to upgrading a vCenter server only impacts your ability to manage the environment but VM/Host operations continue to function. As expected, each cluster temporarily lost connectivity through the Web Interface during failover of the VIP but only for a couple minutes of time.
Configuring NSX Federation with SSO using Workspace One Access
This is a follow-up from a previous blog on this topic where I configured a single NSX Manager integrated with Workspace One Identity to provide SSO capabilities. That can be found here.
I’m taking a little different approach as I’m going to setup access using the VIPs created for each NSX Manager Cluster and the Global Manager Cluster. Starting with the Global Manager Cluster, the option I used in the previous article, load balancing was not used, but I want to use the VIP for each cluster this time around. First I need to configure a few things on Workspace One Access similar to what I did in the previous article. I need to create 3 new applications corresponding to my 3 VIPs.
App1 – NSX (NSX Global Manager VIP access)
App2 – NSXLab (NSX Manager VIP access for my physical lab)
App3 – NestedNSXLab (NSX Manager VIP access for my nested lab)
I’m going to follow the same procedure for the three apps I’m creating using the previous blog details (saving some time here) and should have 3 new Remote Access App Service Client tokens created that I can use with each of the 3 NSX Clusters.

Following the same procedure as in the previous blog, I need the certificate thumbprint of the Workspace One Access server that I’ll need when I register each NSX Cluster using their unique service token. SSH into the WS1A server and run the following command ‘openssl1 s_client -connect <FQDN of vIDM host>:443 < /dev/null 2> /dev/null | openssl x509 -sha256 -fingerprint -noout -in /dev/stdin‘ substituting the FQDN details of the actual WSA1 server. Copy and paste this value as we’ll use that on each setup for each NSX Manager Cluster.
Back to the NSX Global Manager, logging into the NSX Global Manager VIP, selecting the System Tab and on the left menu option under Settings, I selected Users and Groups, then changed to the Identity Manager option. Here’s where I’ll configure SSO authentication options. I’ll need the WS1A service token details to populate this correctly along with the WS1A certificate thumbprint details. I’m not using an external load balancer, just the cluster VIP (ex..FQDN of the global manager VIP is nsx.hudsonlab.com)

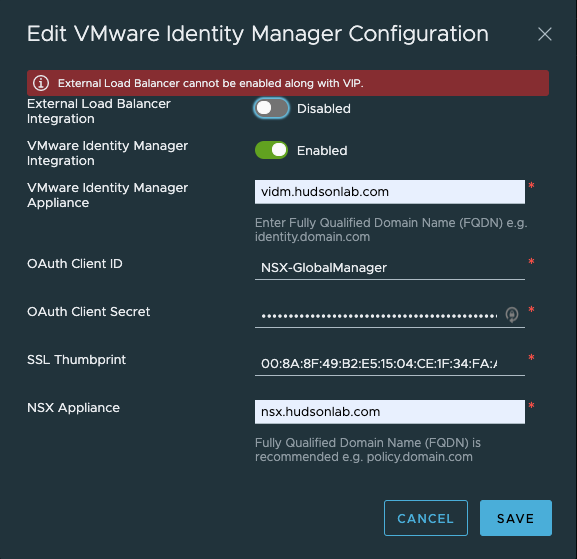
Configured successfully on the NSX side and new app now registered on WS1A that I can assign myself or anyone based on their role for access to the NSX Manager Global Appliance environment.

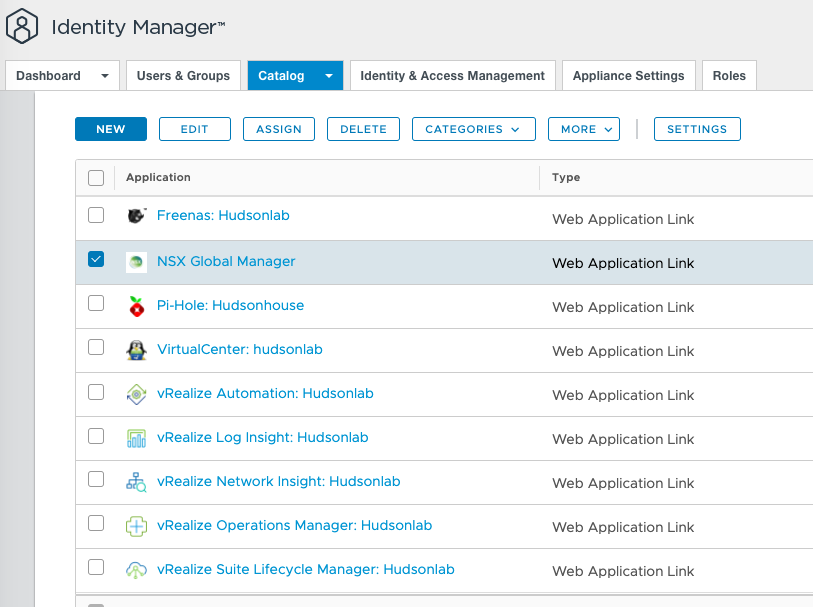
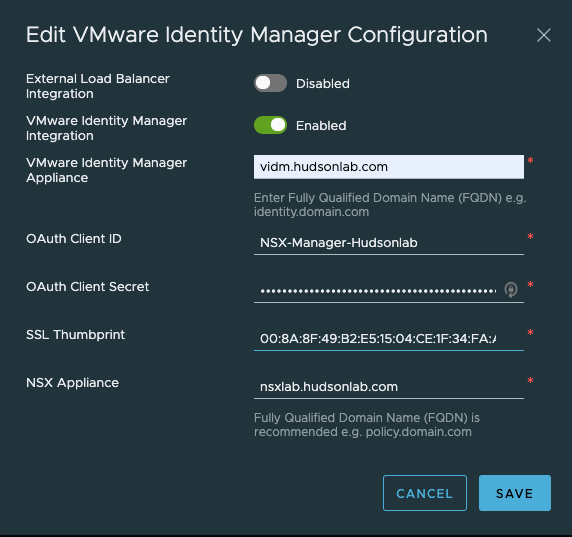
Rinse and Repeat for the other two NSX Manager Clusters


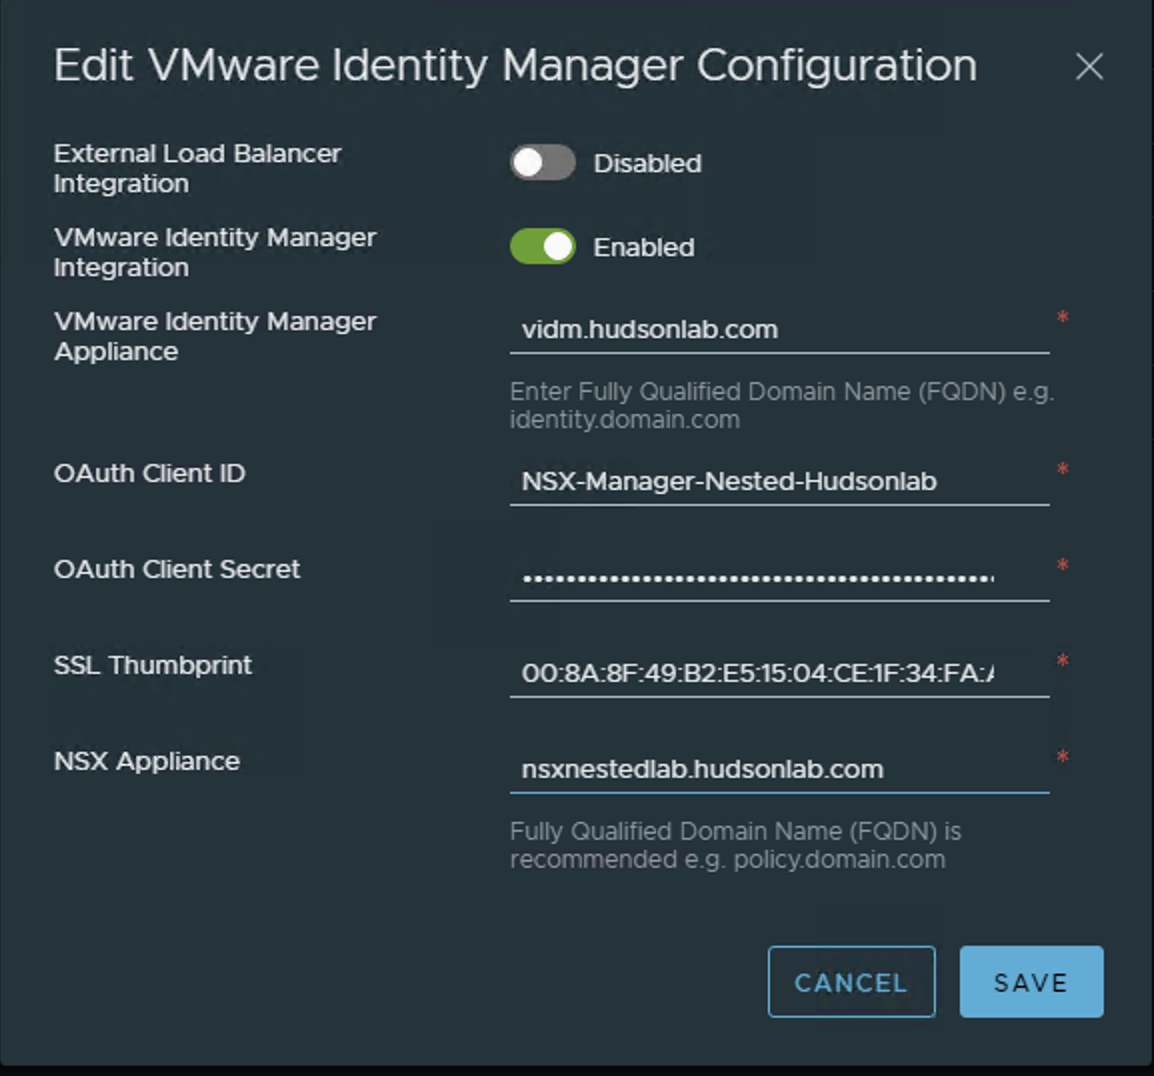
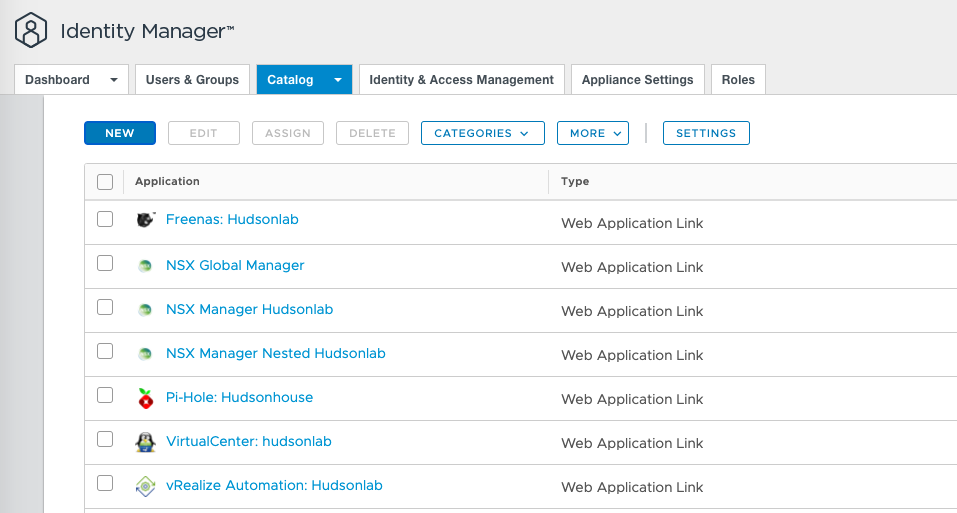
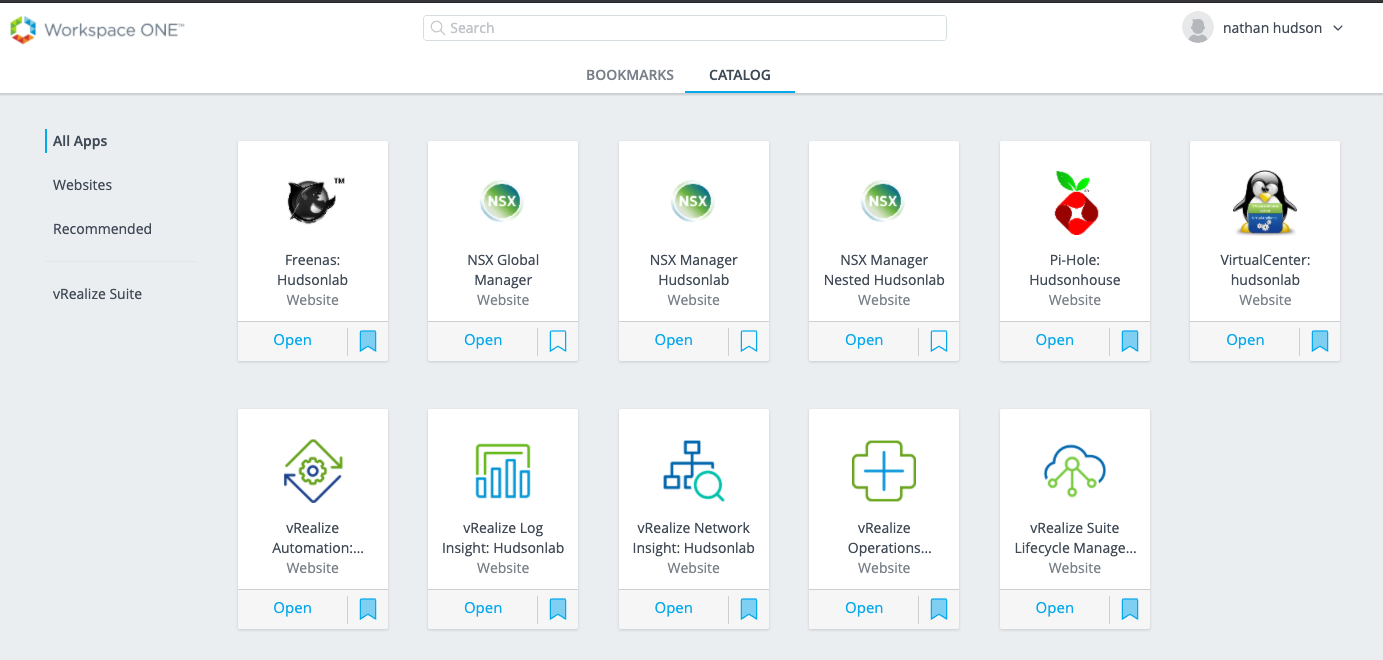
As an alternative, I can log directly into my Workspace One Access web interface and now access all three environments with SSO directly.
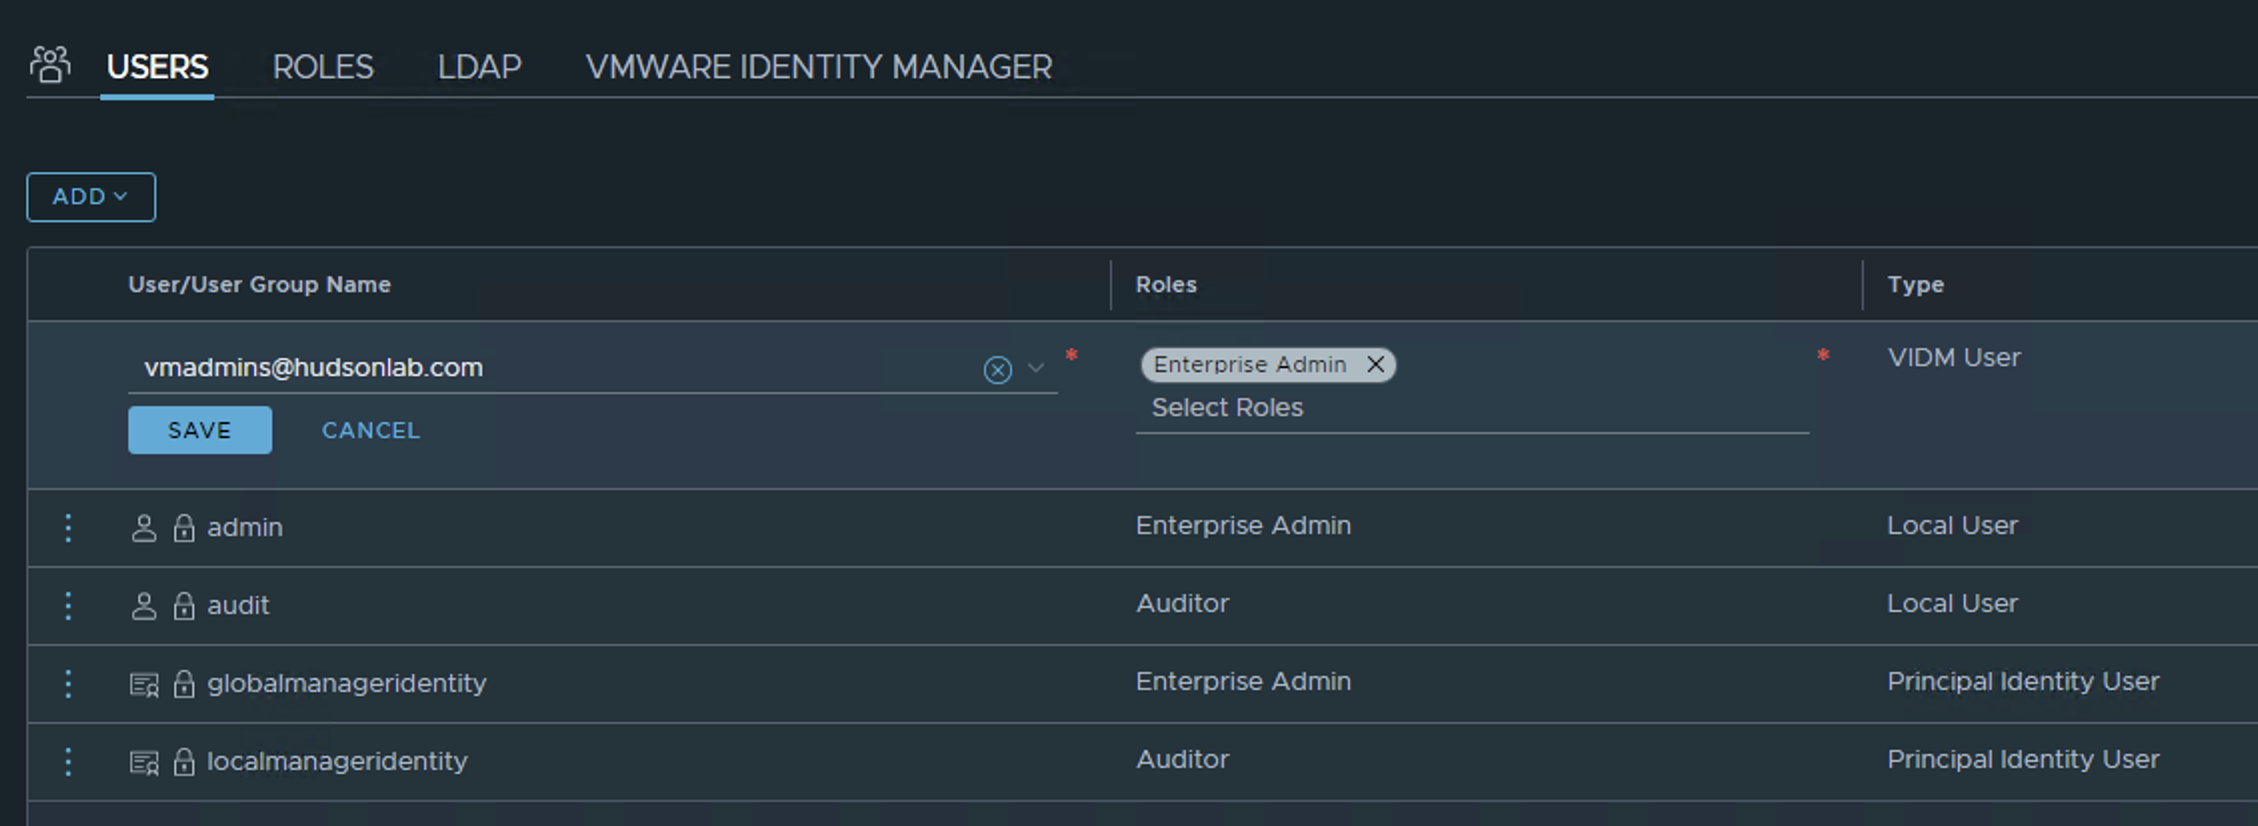
***Important – Once SSO has been configured, don’t forget to go in and add your AD Users/Groups to the NSX Managers’ environments based on the role and scope you want them to have access to, in my case I’m using my default vmadmins active directory group to grant permission. If you forget to do this before logging off, you’ll have a difficult time logging back in once SSO has been enabled.
Now when authenticating to each of my cluster VIP names, I’m redirected to WS1A to authenticate and granted access to log in to each NSX Manager cluster.
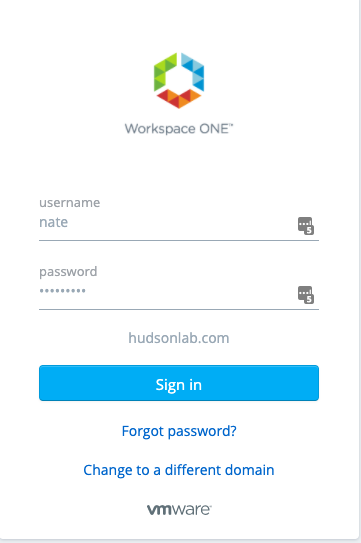
Failsafe on this log in method is that if WS1A is ever down, you will be prompted to login to the NSX Manager with the local credentials or by forcing a local login using the following format: https://mynsxmanger.com/login.jsp?local=true.
Backing up NSX Managers
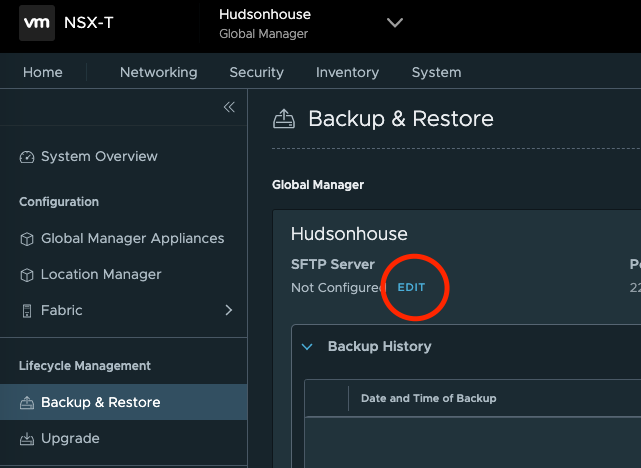
We’re on the home stretch, last thing I wanted to accomplish was setting up backup for each appliance to ensure I have something to recover if any of the NSX Manager appliances goes bad. On the global manager, under the System Tab, left menu option for Lifecycle Management, there’s a backup and restore option. I’m going to use SFTP to my NAS to accomplish this task.
To do this I’ll first need the certificate thumbprint on my NAS. I’m using Filezilla to connect and it has a nifty option to view the thumbprint when you connect and click on the key icon on the bottom.
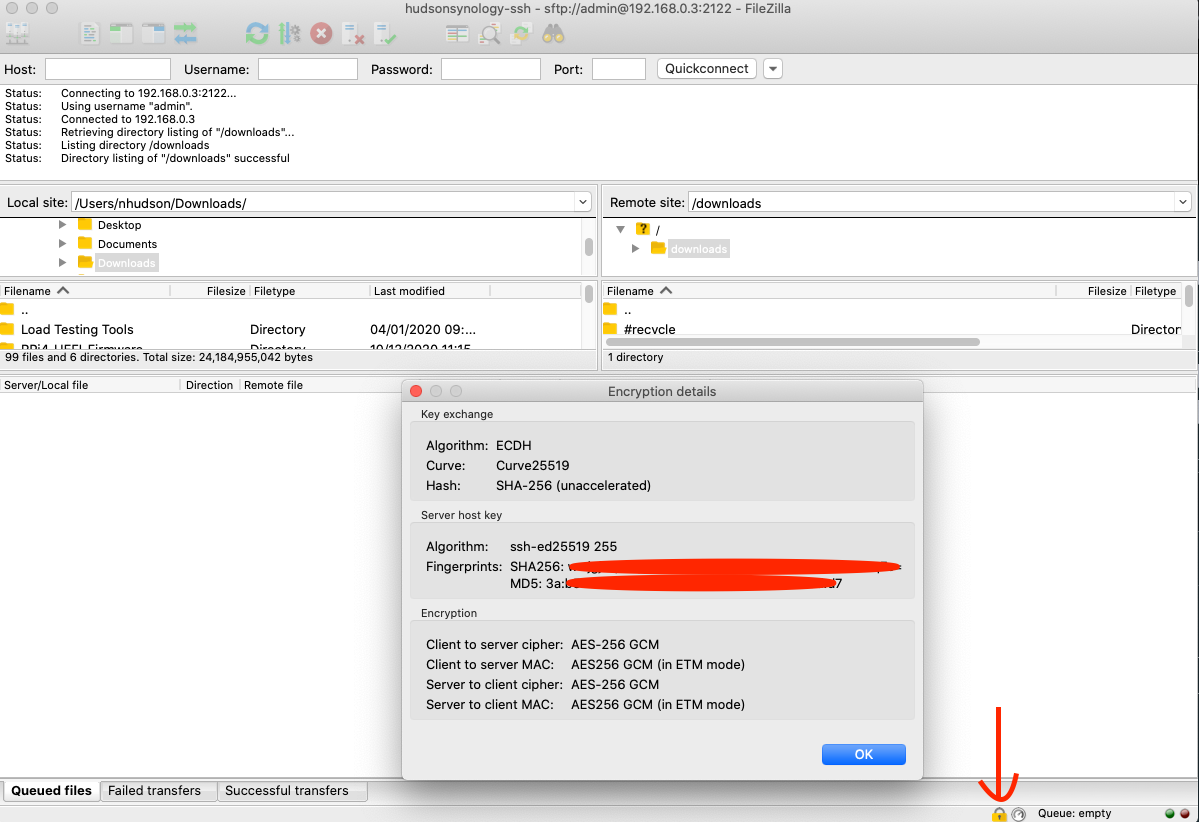
I’ll use the SHA256 thumbprint to connect with the backup option on NSX Manager. Once connected, I’ll set up a schedule to backup on a reoccurring basis using the edit button under the schedule option.

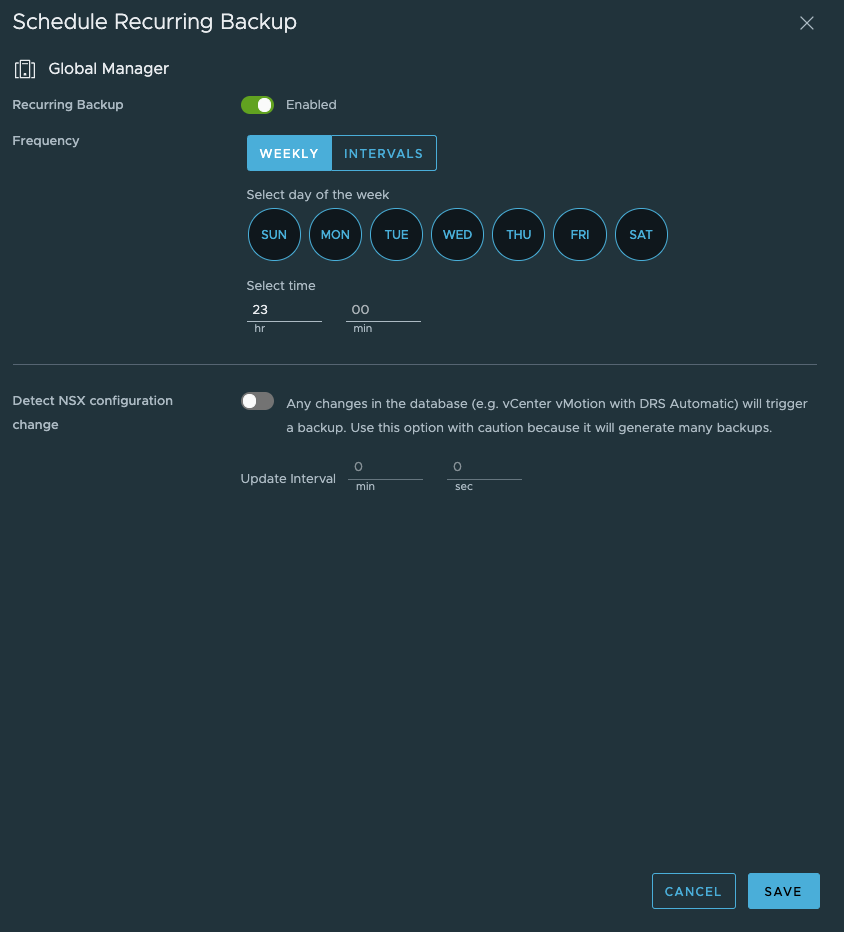
Just for fun, I’ll kick off a backup to make sure it works successfully.
**Note – By logging into the NSX Global Manager, you can configure backups for all the Location Manager clusters from one view.
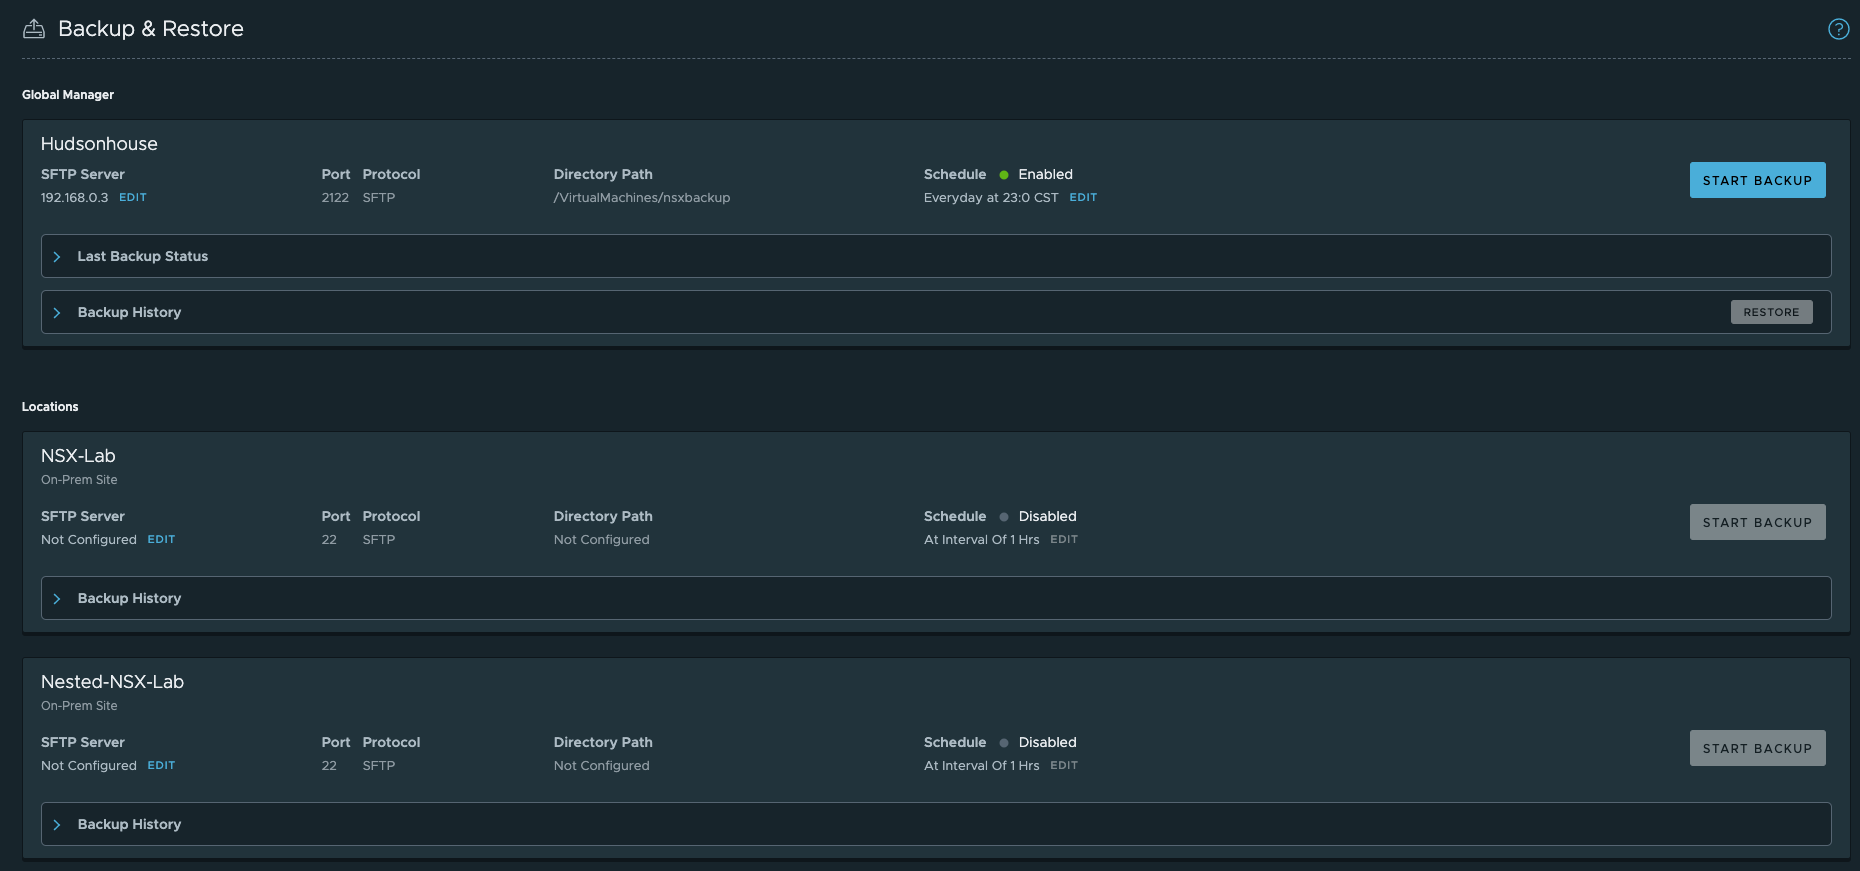
Rinse and repeat for you NSX Manager Clusters and you’ll have a reoccurring backup set in place for you NSX Federation.
Summary
So let’s wrap up what was accomplished.
- NSX-T 3.1 Federated deployment
- 2 Global NSX Managers clustered with a standby node
- 2 NSX Managers clustered for the physical lab gear
- 2 NSX Managers clustered for the nested lab
- All Clusters configured with a VIP
- All clusters configured for backup
- All NSX Manager VIP DNS Names configured for SSO using Workspace One Access
- Simple failover testing (actual upgrade testing will follow)
Hopefully you found this valuable, now on to my next adventure as I begin to setup both lab environments with software defined network capabilities, you may have an NSX Intelligence blog coming too!!


Recent Comments