This is probably more relevant to home lab users as it relates to unsupported hardware, as in my case, I’m running a VMware home lab on unsupported CPU hardware using Dell R710 servers running various Intel Xeon 56xx CPUs. If you want to see how I initially build my lab on the unsupported CPU hardware, you can check out my former blog article here.
I could not work through the normal VMware Lifecycle manager process and ended up using a CD Based install to upgrade my VMware hosts from ESX 7.0.0 to 7.0.2. My 2 biggest challenges were overcoming the unsupported CPUs in my Dell servers and making sure the 10GB Nic card drivers worked post upgrade.
Shout out to William Lam for providing the advanced installer options for allowing unsupported CPUs to allow the vSphere installer to continue and allow my upgrade to complete.
In my case, I ended up working through the normal vSphere upgrade workflow by upgrading my vCenter appliances first and then moving on to my vSphere hosts. I ended up upgrading my primary vCenter server without any issues, but I’m still working through the issues with my second vCenter that manages my nested ESXi portion of my lab due to errors around the online upgrade repo (not critical but I’ll get this sorted out eventually).
Moving on to my vSphere hosts, I downloaded the Custom Dell OEM installer and burned a CD (ouch) and went through the process with each server. Rebooting each host after being placed into maintenance mode, I selected the option at BIOS prompt screen to enter the Boot option menu and chose my CD Rom as the boot device. Once the vSphere installer screen started, hitting the ‘Shift + O’ keys I was able to enter the advanced boot option and added option ‘allowLegacyCPU=true’ and hit enter, went through the normal boot up process, accepting all the options and even the Warning message about installing on an unsupported CPU combination in the server. The upgrade process went quite well with one exception, no driver installed as part of the upgrade that would support the 10GB NIC card in the server (which I use to connect via software iscsi adapter to my Synology NAS).
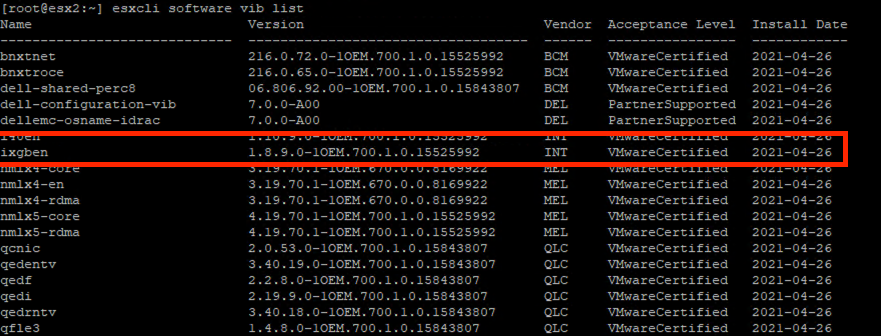
I ended up doing some troubleshooting by logging into my ESX hosts via SSH and running a query for installed VIBs (esxcli software vib list) and discovered that the ixgben driver in use on my upgraded server was using a Dell driver named ‘INT_bootbank_ixgben_1.8.9.0-1OEM.700.1.0.15525992’ and my working esx hosts running vSphere 6.7U2 were using ‘VMW_bootbank_ixgben_1.7.1.26-1vmw.700.1.0.15843807’.

As luck would have it, I ran into this issue when I upgraded my lab from 6.5 to 6.7 and kept the older 10GB NIC driver on a shared datastore. So my next step was to uninstall the existing VIB and install the previous VIB that I knew would work on my particular server.

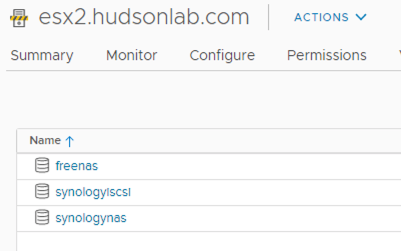
Upon a successful reboot of the server after removing and installing the correct driver, I now had a working ESX 7.0.2 server that kept all the existing configurations and was able to see my synologyiscsi datastore.
One thing to note, in order to successfully reboot the host, I edited the boot.cfg files and added the ‘allowLegacyCPU=true’ option to the /bootbank/boot.cfg and /altbootbank/boot.cfg files appending the kernelopt line to allow that setting to stick after rebooting. Using SCP and editing these two files works successfully.

Rinse and repeat with the other lab servers and we’re all upgraded successfully. Hopefully this was useful for those that may be in my same situation using similar hardware but more importantly, provides some guidance on how to troubleshoot a potential failed upgrade on a host.
If you want to use nested vSphere, William Lam has a public shared content library with all the virtual appliance versions available to add to your vCenter content library configuration. When using the nested appliances on unsupported hardware, keep in mind that you’ll need to follow the same process on those nested appliances in order to boot them successfully. On first boot, use the Shift + O option and append the ‘allowLegacyCPU=true’ option and after successfully booting, follow the process above to edit the boot.cfg files.
On a side note, one of the upgrades did not work as expected and upon initial upgrade, I lost all connectivity and could not manage the host at all.
**Useful tip: if you need to revert a host to a previous configuration, when booting up the host into ESXi, one of the options is to select ‘Shift+R’ and boot your server into recovery mode which reverts the server to the alternate boot bank that was functioning prior to the upgrade.


Recent Comments