Ever wondered how to configure direct login access to your vSphere hosts using your Windows Active Directory credentials?
I’ve been having these conversations with varying VMware customers over time and the subject always comes up when it comes to implementing some additional security controls over your VMware infrastructure.
As you are aware, the direct login access to an individual vSphere ESXi host has been available for quite some time but most customers that I have worked with use the traditional root login to access individual hosts. This may be needed due to troubleshooting host disconnect issues or troubleshooting an individual ESXi host when vCenter is not available or not being used. Other options may include using Auto-Deploy to provision hosts and have them automatically joined to the domain based on hosts pre-defined in the vCenter access control list.
To add a more secure manner of authentication to your vSphere ESXi hosts, and by leveraging a more secure method of tracking direct login attempts not as root, you can configure stand-alone hosts or even hosts connect to vCenter to use Windows Active Directory Authentication. This will also allow you to set in place a root password rotation policy and restrict root logins for only those critical situations where other authentication methods are not available.
There are 5 configuration steps necessary to make this happen.
- Enable and configure the vCenter Authentication Proxy service on vCenter.
- Copy the vCenter certificate to a shared directory your ESXi hosts will have access to.
- Configure the preferred Windows Active Directory group that will be used for authentication to ESXi hosts.
- Configure the advanced settings on ESXi hosts for the Active Directory Group
- Join the ESXi hosts to the domain using the vCenter Authentication Proxy
Step 1
There are actually two parts to this first step.
The first part is setting up the configuration on the vCenter Server using the Configure Authentication Proxy settings. If you are logged into vCenter, select the vCenter and go to the Configure Tab and under settings, select the Authentication Proxy option. You’ll enable the service and configure your domain settings for the Domain to join, the Domain User authorized to join computers to the domain and the Domain User Password.

The second part involves logging into the vCenter VAMI and enabling SSH if not already enabled. (https://myvcenter.mydomain.com:5480). Login to the VAMI UI and select Access on the left pane, edit your Access settings and enable SSH login.
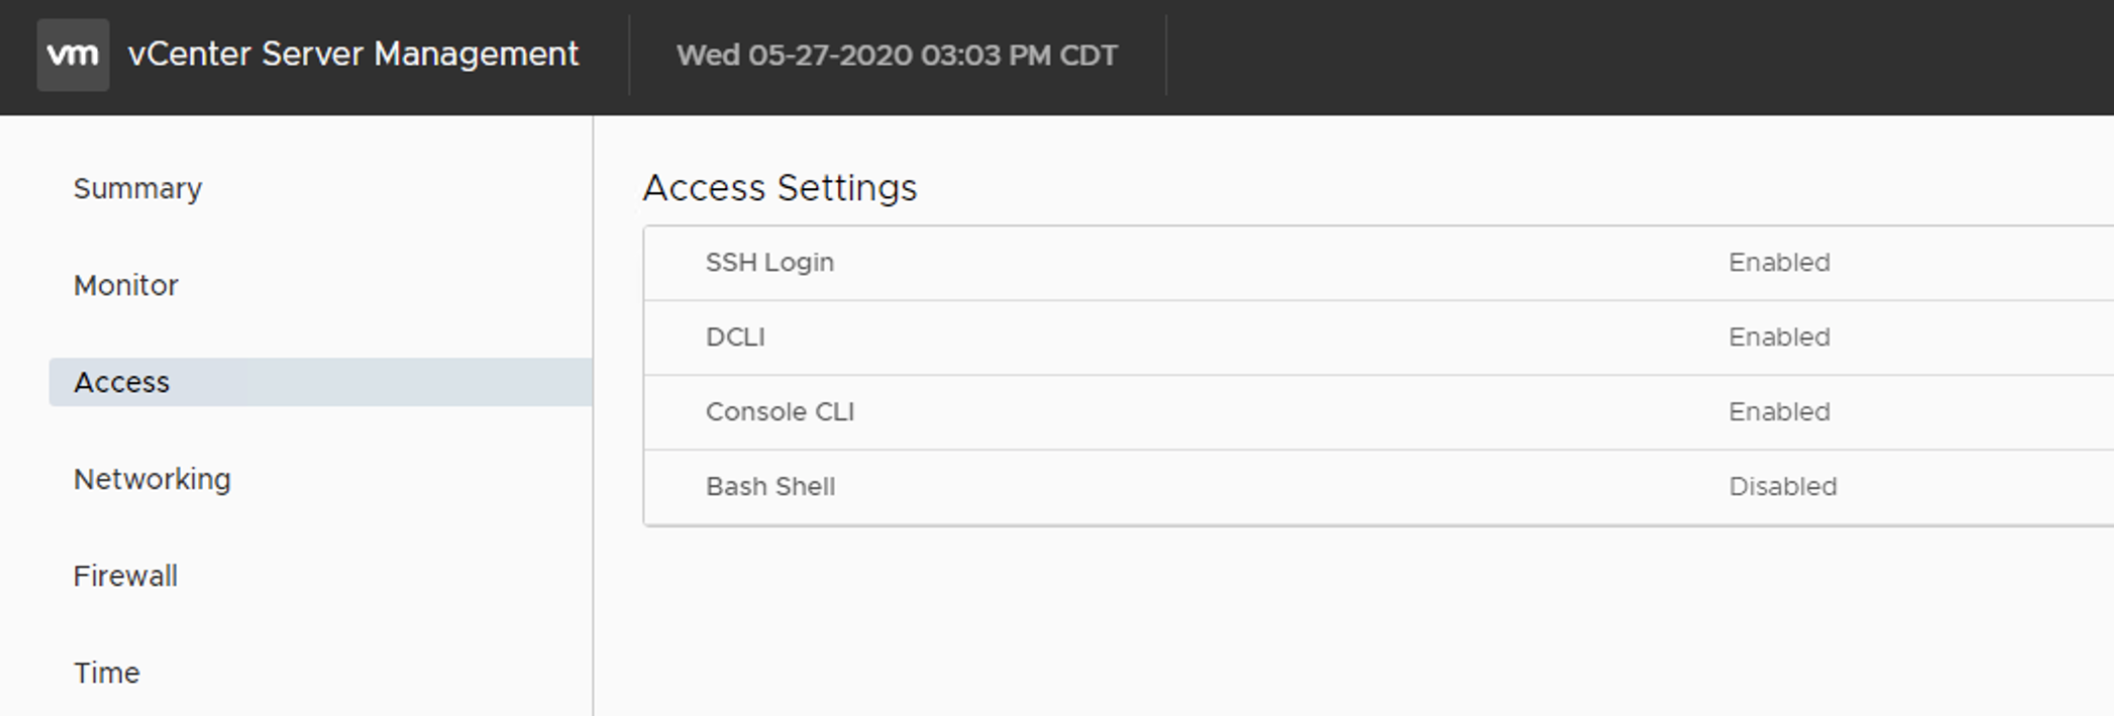
Once SSH is enabled, you will open a putty session to your vCenter and run the following command logged in as root.
/usr/lib/vmware-vmcam/bin/camconfig ssl-cliAuth -e
This command enables the authentication proxy service to accept incoming ssl connections to join the domain provided they are setup with the correct SSL connection, which we’ll get to next.
Step 2
While still logged into the vCenter SSH session as root, you will need to copy the certificate used by the vCenter Authentication Proxy Services to a shared directory that your ESXi hosts have access to (in my case, and example below, I am copying the rui.crt file from the vCenter to a shared datastore directory on my synology storage nas)
scp /var/lib/vmware/vmcam/ssl/rui.crt [email protected]:/vmfs/volumes/synologynas/authproxycert/rui.crt
Step 3
Now you’ll need to configure your Active Directory Group to be used for authenticating users that are members of that group for direct login access to the ESXi host. The default group on ESXi 7 is called ‘ESX Admins’, so you have two choices, either create an AD group called ESX Admins or reconfigure the ESXi host advanced settings to use a preconfigured group of your choice. In my case, I created an AD group called ‘VMAdmins’ that I wanted to use.
Step 4
Now you’ll need to set the advanced settings on ESXi servers to use that group. The configuration setting is called ‘Config.HostAgent.plugins.hostsvc.esxAdminsGroup’. You can do this manually on each host that you want to use Active Directory Authentication or you can use a powershell script as an example below details.
Manually
From vCenter: Select your ESXi host and go to the Configure Tab, under System select Advanced System Settings and click on the Edit button on the top right of the screen.

Search for ESXAdmin and the advanced option should pop up pre-populated with the default group (I’m changing mine to VMAdmins)
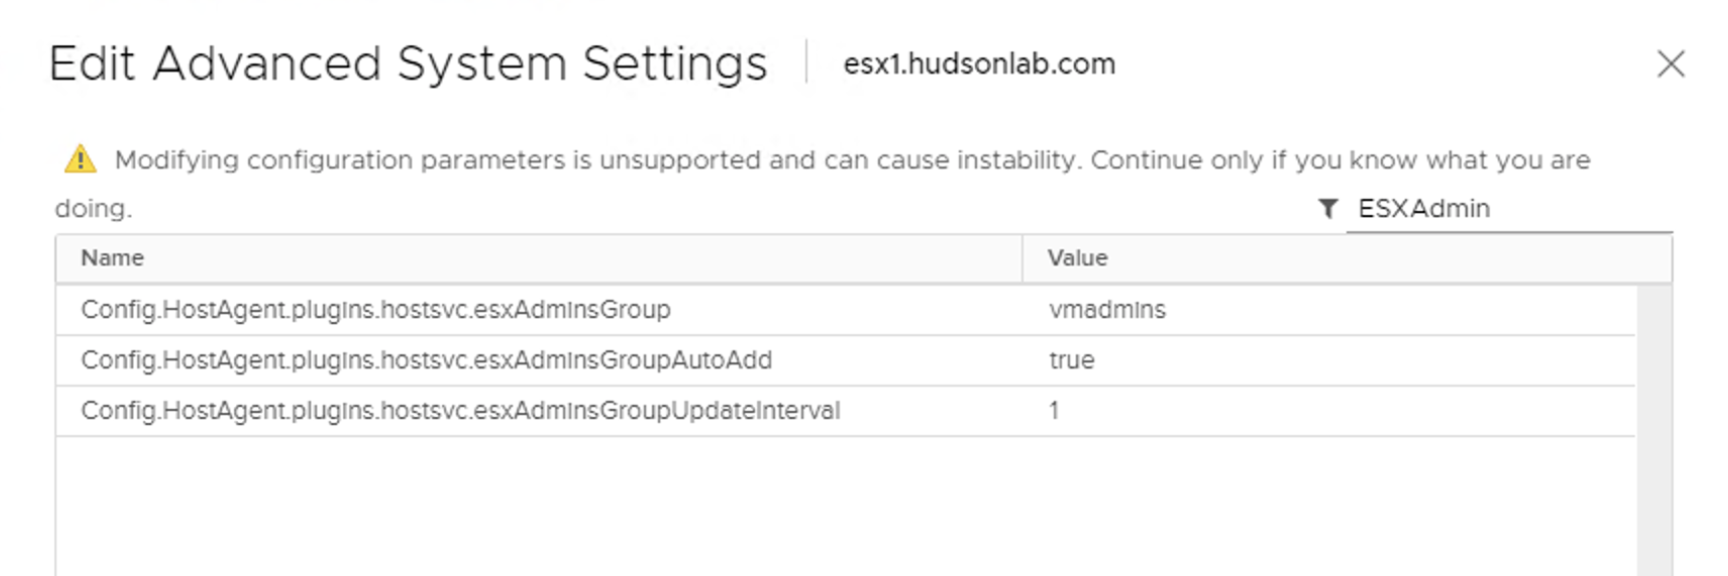
Once you’ve made the change, click on OK and your done.
Scripted
Get-VMHost | Get-AdvancedSetting -Name Config.HostAgent.plugins.hostsvc.esxAdm
insGroup | Set-AdvancedSetting -Value “GROUPNAME” -confirm:$false
In my case I would sub GROUPNAME with vmadmins.
Step 5
Now the last step involves importing the certificate we copied to the shared datastore location in step 2 above to each ESXi host we want to join to the domain and then select the option to join the domain using the vCenter Authentication Proxy. (Note: if you choose to although I would recommend against this option, you can bypass the certificate import process by changing the advanced settings on your hosts and setting the flag to 0 on each host with this advanced setting “UserVars.ActiveDirectoryVerifyCAMCertificate”)
Select your ESXi host from the vCenter console, go to the Configure Tab and under System, select Authentication Services.

You’ll want to first choose the Import Certificate Option and provide the certificate path and the server IP address of your vCenter server running the Authentication Proxy Service we just configured above. You’ll use the format of datastore in brackets with the path to the folder and cert name as in my example below along with the IP address of your vCenter.
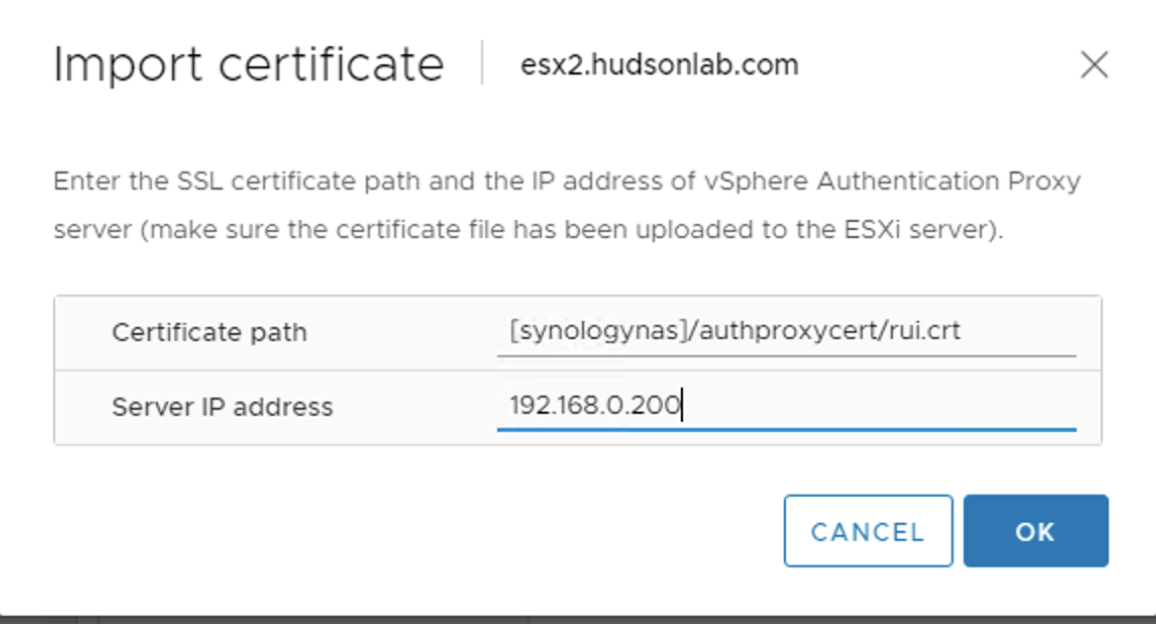
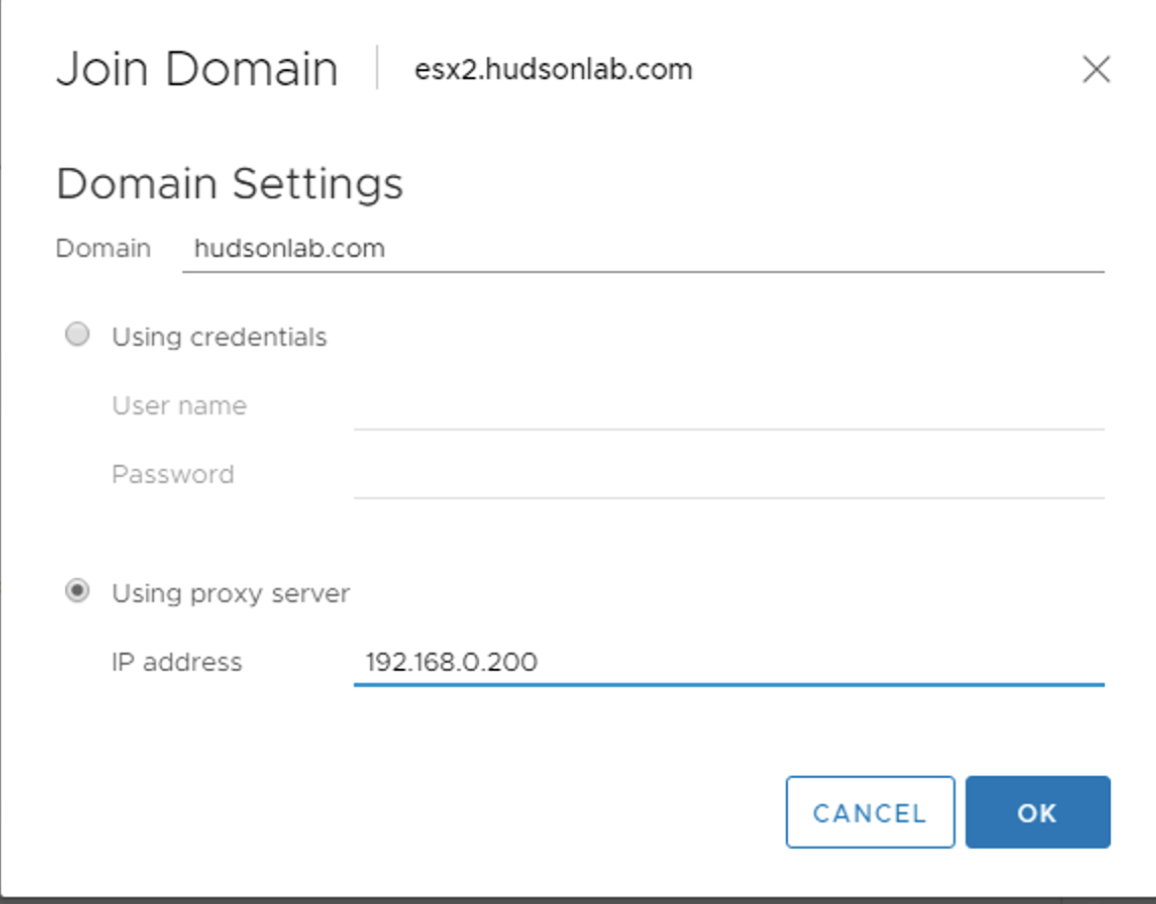
Next you’ll choose the Join Domain option and populate the Domain name you’ll be joining the ESXi host to and then select the radio button for Using proxy server and populate the IP address of your vCenter server. (in my example below, I’m joining the ESXi host to my lab domain and using my lab vCenter IP address) Click on OK and the host should join the domain securely.

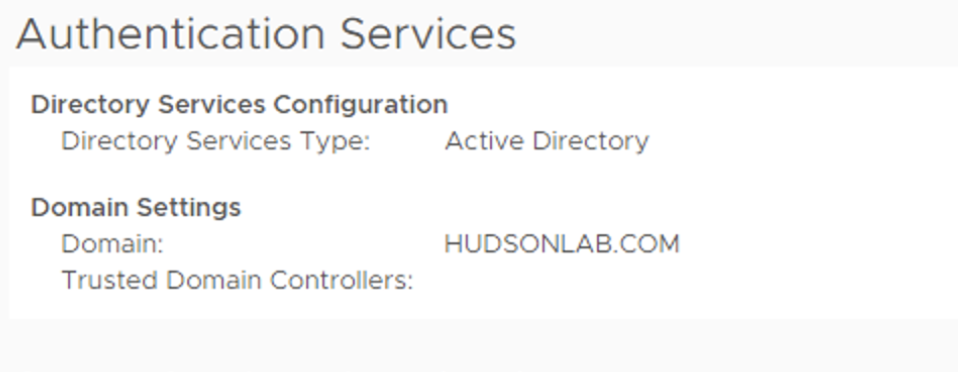
Just to verify, he’s a look from the Active Directory Users and Computers view

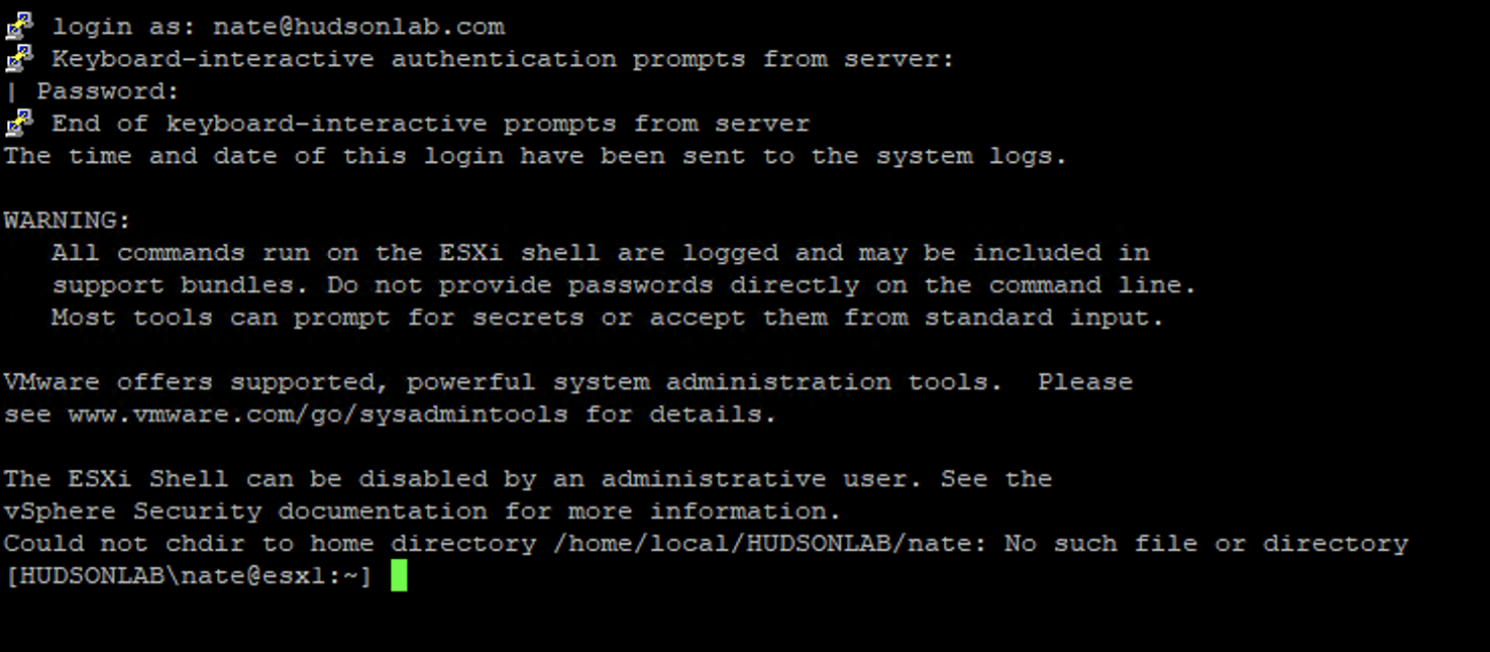
That’s it, 5 easy steps to get your hosts joined to Active Directory, and now I can log in with an account that is a member of the AD group I chose to use (in my case the vmadmins group) and directly log in with credentials logged for users in the ESXi syslog to track from a security point of view.
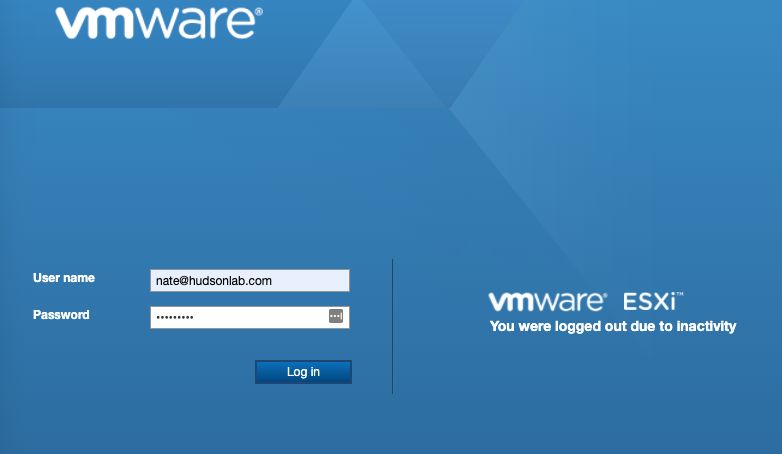

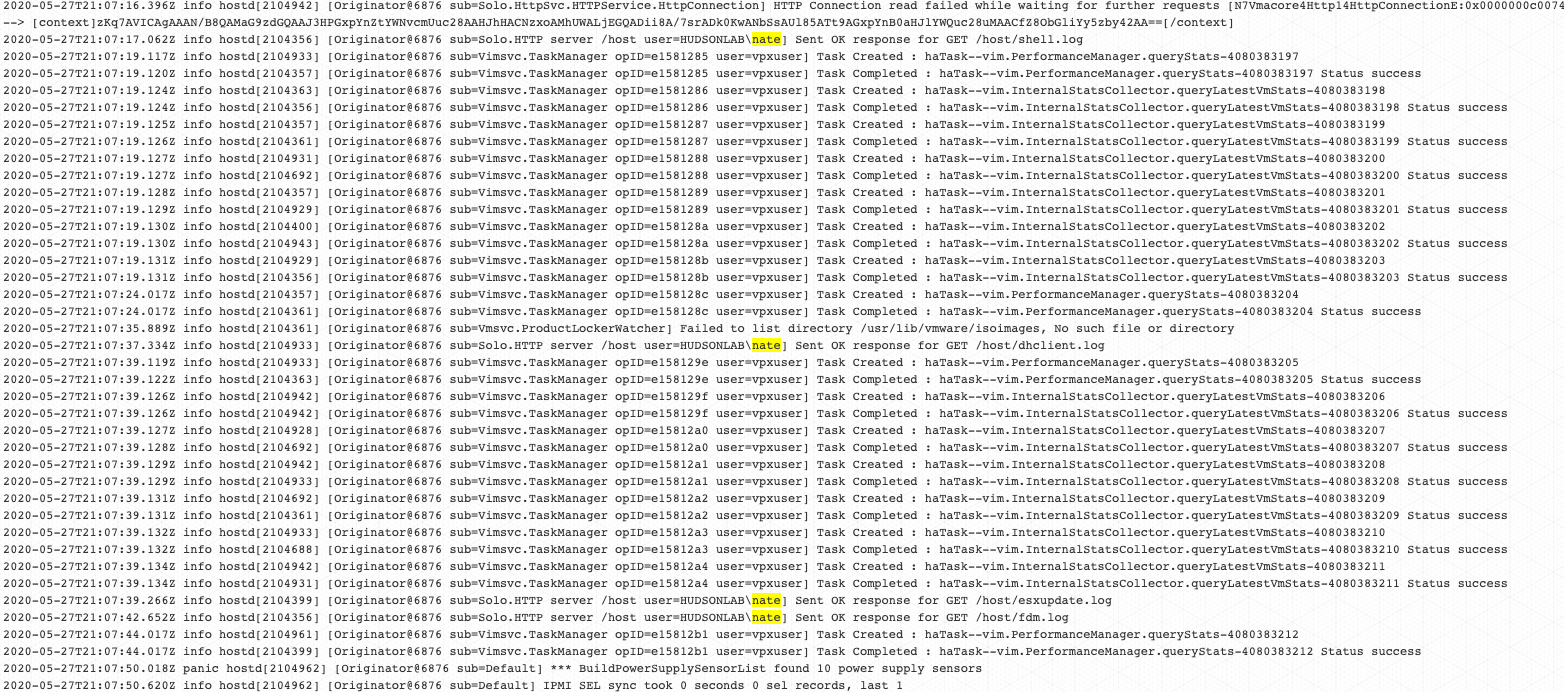
This works for SSH access to your hosts as well so you don’t have to log in as root all the time.
***It’s important to note that when using host profiles, the advanced settings that were configured during the previous steps are captured, so when using Auto Deploy, assigning the host profile to the corresponding ACL host will have this information pre-populated and can be setup using the Image Builder process.
References: VMware Documentation Using vSphere Authentication Proxy


Recent Comments